


Microsoft has certainly made some improvements in Windows 11, but some of the changes will take some getting used to. We are creatures of habit, and some of the interface differences will make some tasks harder, at least at first. And avoiding a Microsoft account has become even more difficult in Windows 11, but it’s still possible.
In this story I’ll show you workarounds that will help you overcome some of the difficulties Windows 11 introduces if you’re used to working in Windows 10.
1. Setting up Windows without a Microsoft account
Since Windows 8, Microsoft has pushed people to log in to their Microsoft account (or create one) when clean installing Windows or when setting up a new device out of the box, to the annoyance of those who would prefer to use a local account that’s not connected to Microsoft’s servers. Microsoft is getting even more aggressive with this in Windows 11, stating in the system requirements, “Windows 11 Home edition requires internet connectivity and a Microsoft account.”
Nevertheless, there is a way to skip the Microsoft account requirement so you can just create a local Windows account. This trick is useful if you’re really against signing in to Windows, and also in cases where you’re prepping a device for someone else and you don’t have their Microsoft credentials.
In Windows 11 Pro, you can skip the Microsoft login easily during the initial setup. On the “Let’s connect you to a network” page, just click or tap I don’t have Internet, and then on the “Connect now to quickly get started on your device” page, click or tap Continue with limited setup. Then you’ll be able to enter a username for the local Windows account.
In Windows 11 Home, Microsoft doesn’t give us any apparent way to skip it in the setup wizard. Although it’s a bit more difficult than in the Pro edition, there is a workaround in the Home edition to skip the Microsoft login (and internet access) requirement when you’re in the initial setup screens of Windows 11:
- Ensure the device isn’t connected to an ethernet network connection before starting the Windows 11 setup process.
- On the “Let’s connect you to a network” page, press Shift + F10 at the same time.
- On the Command Prompt window that pops up, type in taskmgr and press Enter.
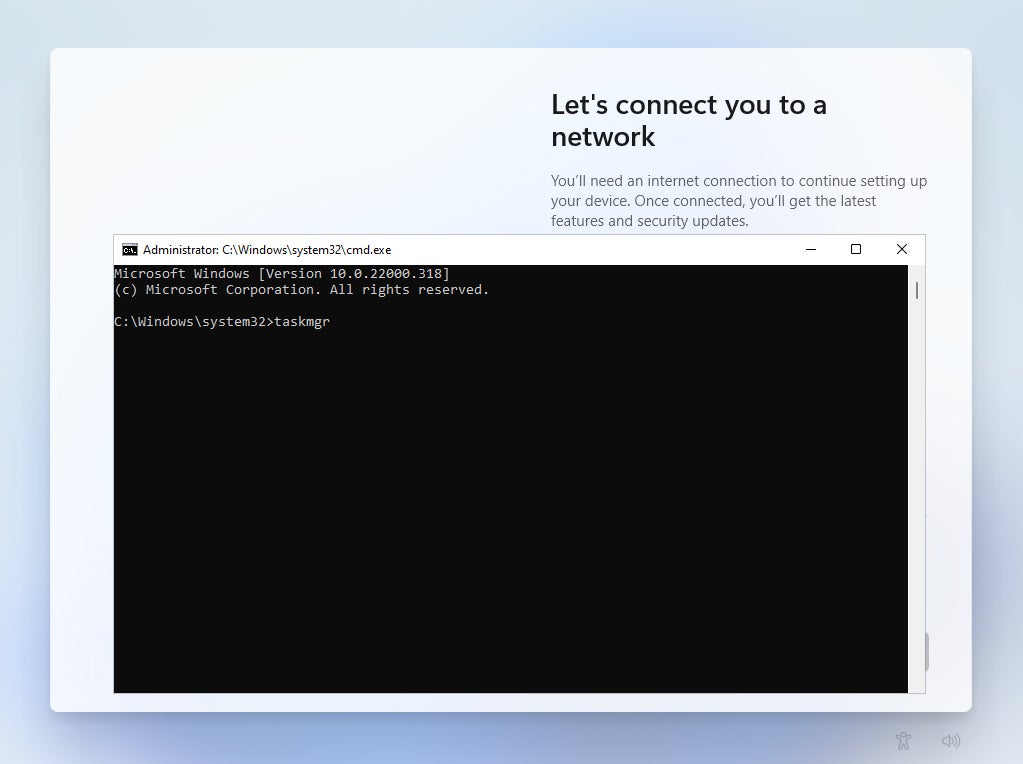 Eric Geier / IDG
Pressing Shift + F10 in Windows 11 setup opens the Command Prompt, where you can run the command to open the Task Manager. (Click any image in this story to enlarge it.)
- On the Task Manager window that pops up, click or tap the More Details button.
- Under the Processes tab, find Network Connection Flow, click or tap it, and then click or tap the End task button.
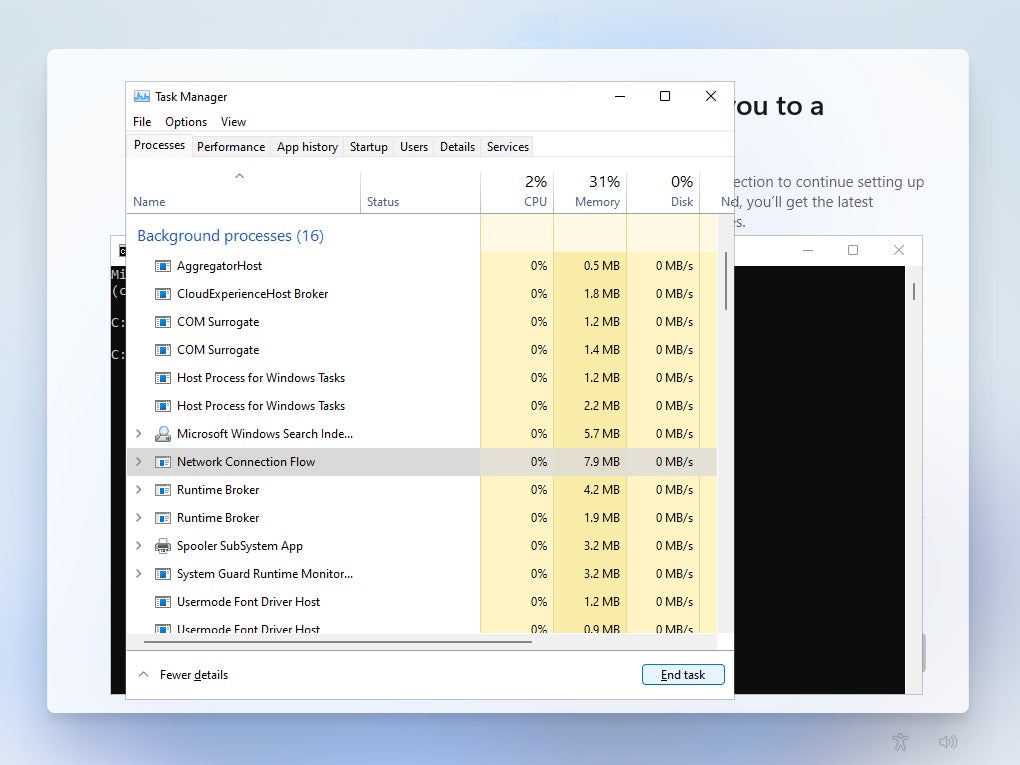 Eric Geier / IDG
In Task Manager, kill the Network Connection Flow process so you can skip the Microsoft login.
- Close the Task Manager and Command Prompt, and you’ll then see where you can enter a username for the local Windows account.
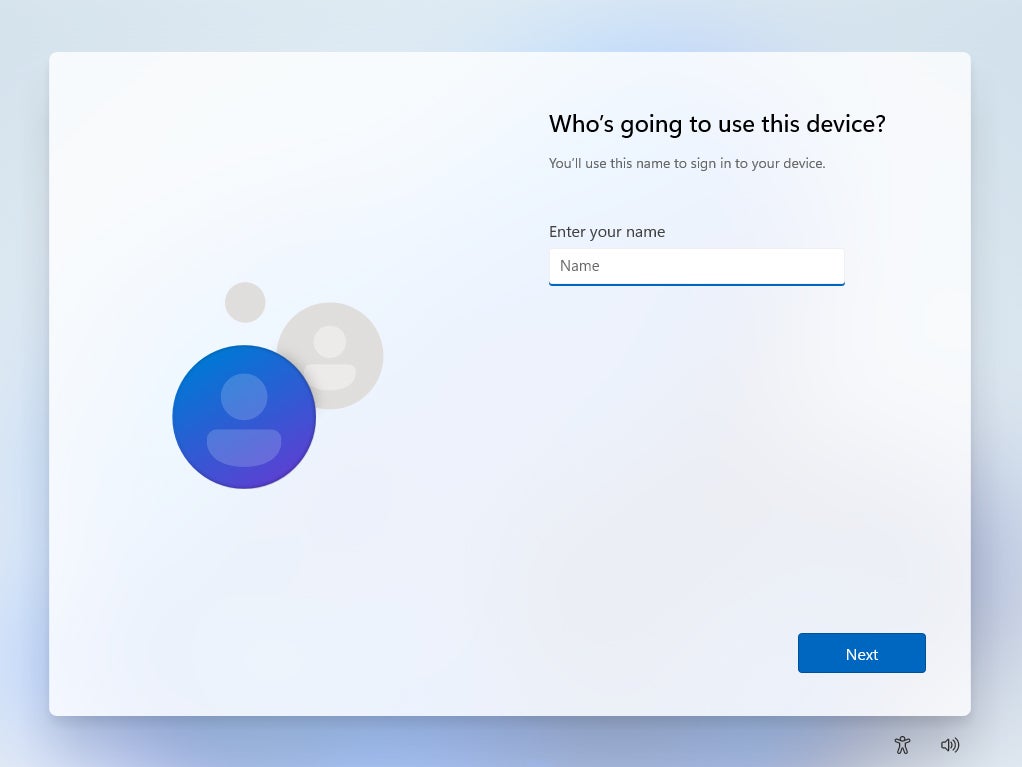 Eric Geier / IDG
Killing the Network Connection Flow process allows you to create a local user account.
Note that signing in with a Microsoft account does provide certain advantages, such as access to OneDrive, OneNote, and other Microsoft services; enhanced security features including two-factor authentication and full-disk encryption; the ability to sync data, apps, and settings between Windows PCs; and more recovery options if you forget your password or need to reinstall Windows. If you decide later you want to switch from the local account to a Microsoft account, select Start > Settings > Accounts > Your info > Sign in with a Microsoft account instead, then follow the prompts to log in to an existing account or create a new one.
2. Clicking the Start button
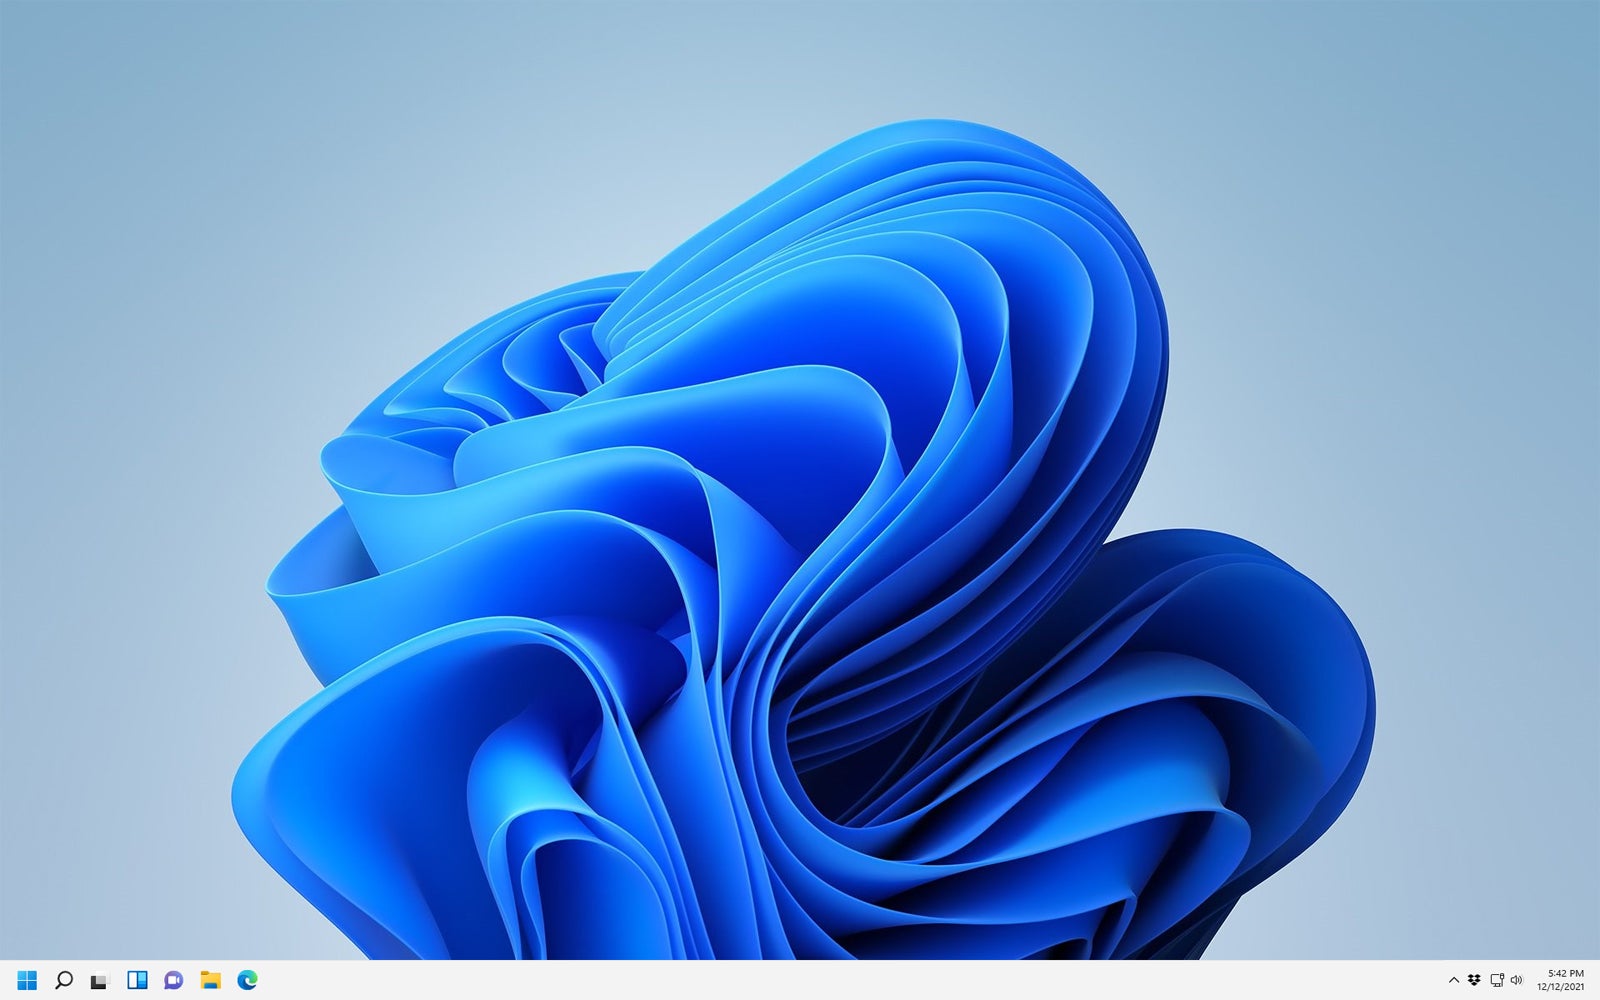
After more than two decades of a left-aligned Start button and taskbar in Windows, the centering of the taskbar icons, including the Start button, in Windows 11 will likely throw everyone off for a bit. If you find it’s too much to get used to, especially if you’re still using prior Windows versions on other machines, you can adjust the alignment back to the left. This is actually the easiest fix we’ll cover.
 Eric Geier / IDG
The centered taskbar icons in Windows 11 reminds me of Chrome OS and macOS.
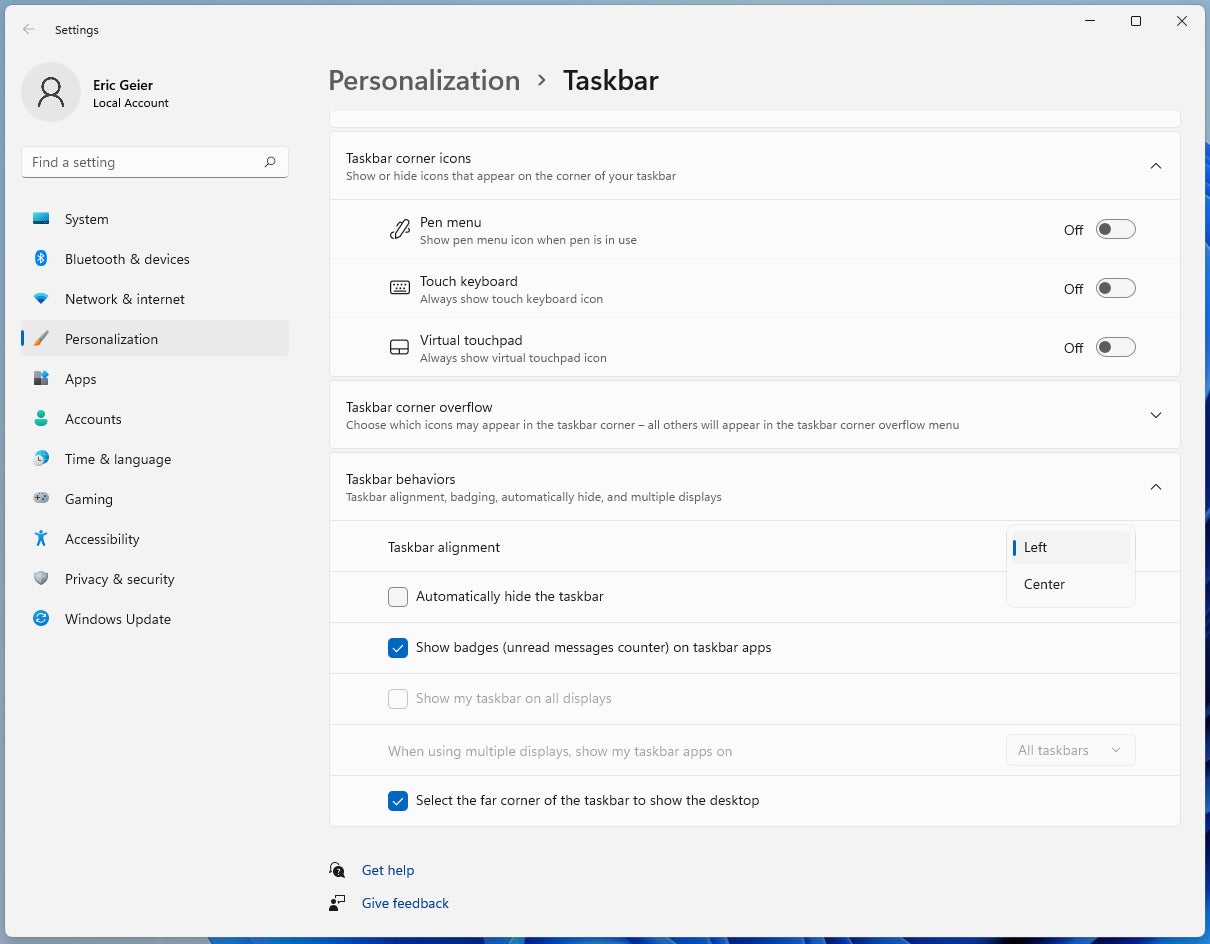
Simply right-click anywhere on the taskbar (except on icons) and select Taskbar settings. In the Settings window that appears, select Taskbar behaviors, and for the Taskbar alignment you can switch to Left.
 Eric Geier / IDG
Luckily, it’s a quick workaround to take the taskbar icons back to the left.
That’s it! But while you’re here, you can also enable the taskbar auto-hide feature if you desire; checking the Automatically hide the taskbar box means that the taskbar will appear only when you move your cursor to the bottom of the screen. Plus, up on the top of the Taskbar settings (not pictured in our screen shot), you can hide the default taskbar icons (Search, Task view, Widgets, and Chat) if you want to.
 Eric Geier / IDG
The simple task of hitting the Start menu will likely be easier with muscle memory once you align the taskbar icons back to the left.
3. Getting full context menus when right-clicking
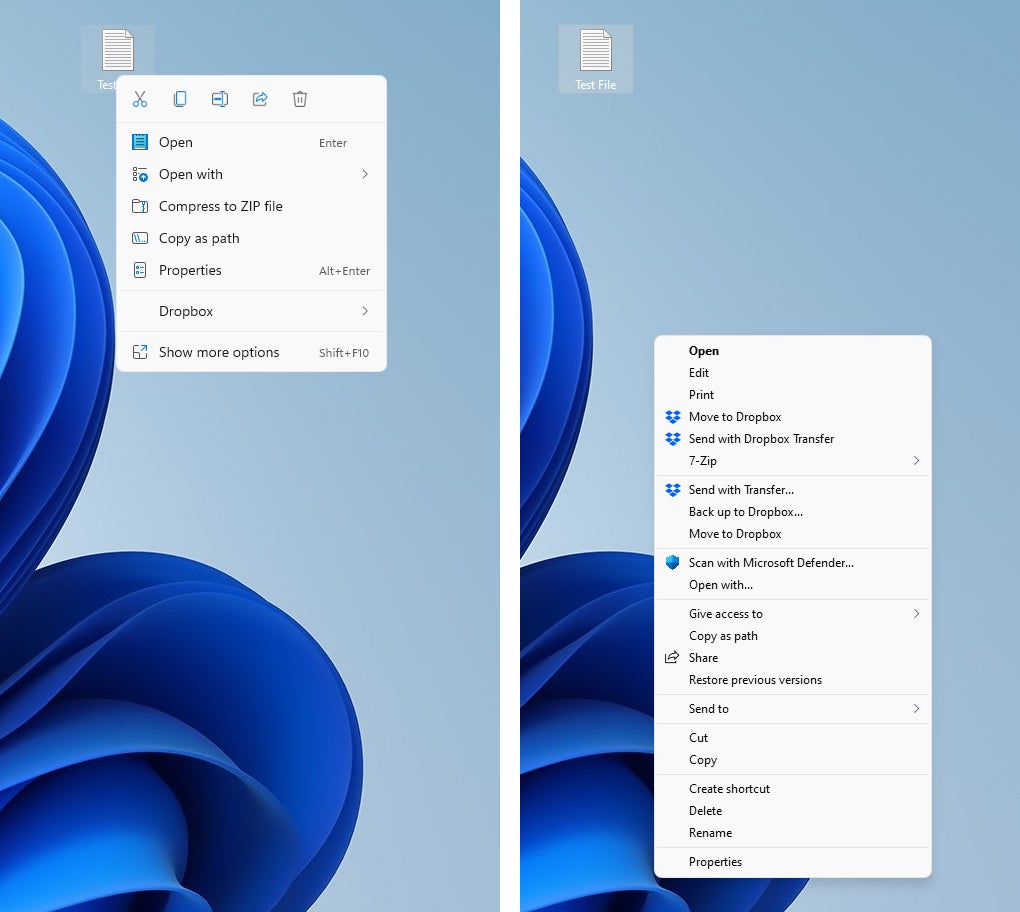
When right-clicking most apps, files, and other items in Windows 11, you’ll be surprised to see an abbreviated context menu. It looks nice and slick, but you might find that some of your favorite commands and shortcuts have been moved out of the initial context menu, especially if they’re related to third-party applications. You can access the full list of options by tapping or clicking Show more options at the bottom of the menu.
 Eric Geier / IDG
On the left is the default context menu when right-clicking a file in Windows 11. On the right is the full context menu like the one you’re used to in Windows 10.
If you find the abbreviated context menu is too annoying, there is a Registry hack you can perform to always see the full context menus right away. Important: Always back up your system before tweaking the Windows Registry. Then proceed as follows:
- Copy the command below:
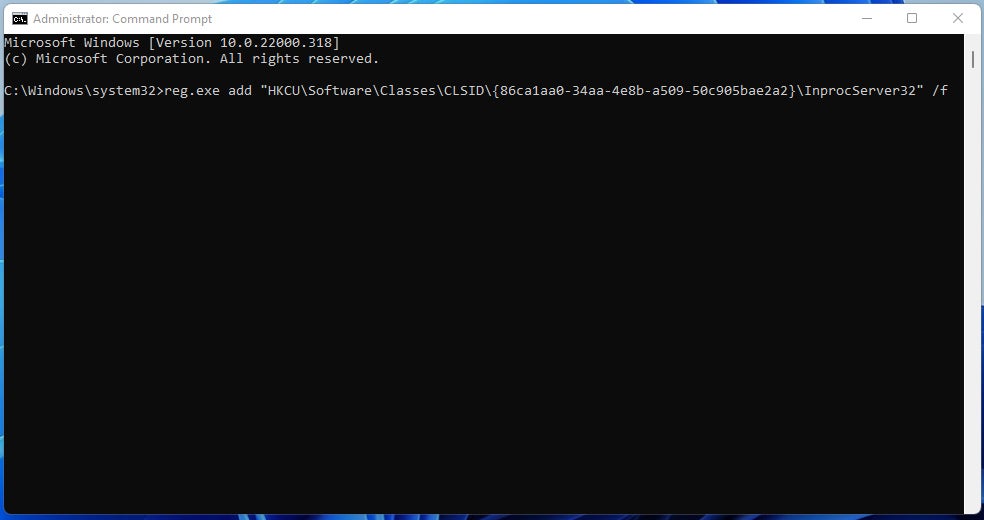
reg.exe add “HKCU\Software\Classes\CLSID\{86ca1aa0-34aa-4e8b-a509-50c905bae2a2}\InprocServer32” /f
- Click or tap the Search icon on the taskbar, enter cmd, right-click the Command Prompt listing from the search results, and hit Run as Administrator.
- On the Command Prompt window, right-click anywhere on the black Command Prompt screen to paste the command, and hit Enter.
- Restart your device and give right-clicking a try.
 Eric Geier / IDG
Copying and pasting this command edits the Windows Registry to get rid of Windows 11’s abbreviated context menus.
If you change your mind and want the abbreviated context menus back, you can reverse the change:
- Copy the command below:
reg.exe delete “HKCU\Software\Classes\CLSID\{86ca1aa0-34aa-4e8b-a509-50c905bae2a2}” /f
- Click or tap the Search icon on the taskbar, enter cmd, right-click Command Prompt, and hit Run as Administrator.
- On the Command Prompt window, right-click on the black screen to paste the command, and hit Enter.
4. Changing default apps to non-Microsoft apps
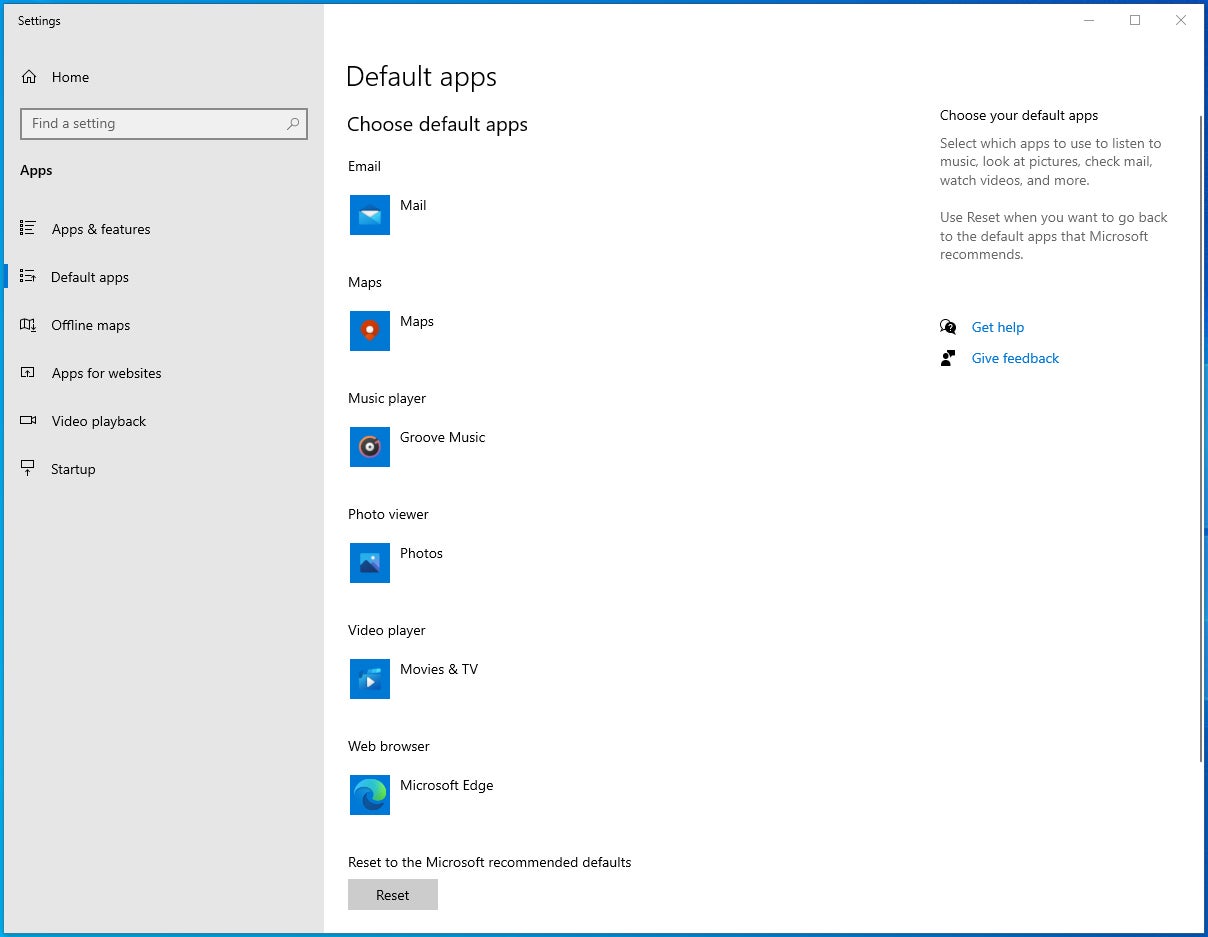
In the Settings app in Windows 10, you could easily change a couple default application types (such as the web browser, video player, and email client) from Microsoft’s apps to favorite applications you’ve downloaded. In Windows 11, you can still change the default applications, but it’s harder.
 Eric Geier / IDG
In Windows 10, it’s easy to change the default apps for a few different categories…
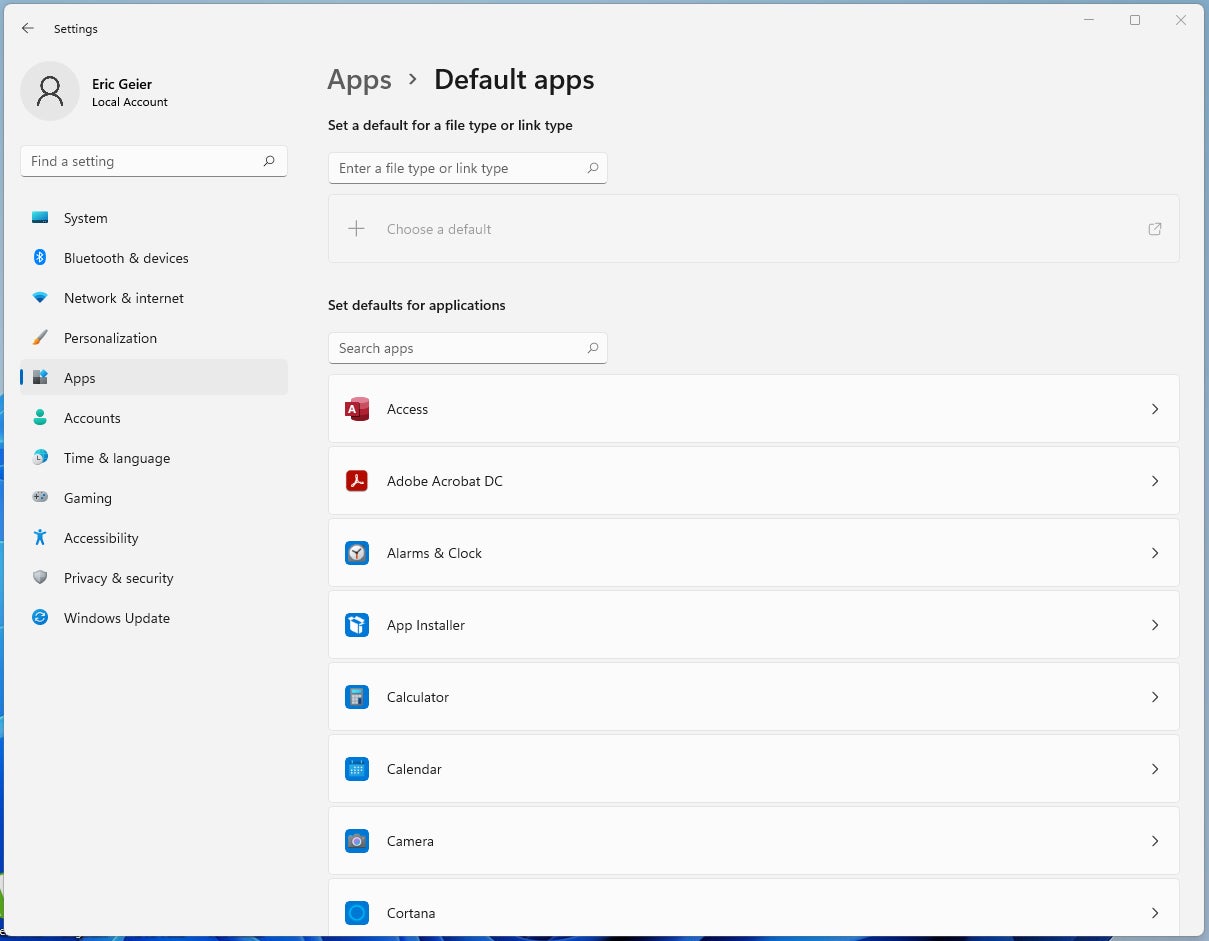 Eric Geier / IDG
…but Windows 11 just gives you a list of all the apps, and selecting one shows you each extension or link type it can open.
In Windows 11, here’s how to access the default settings:
- Click or tap the Search icon on the bottom taskbar, type default, and click or tap Default apps from the search results.
- Click or tap the application you’d like to make a default, and then take a look at all the different file extensions or link types it can handle.
- Click or tap the extension or link type you want to configure the default for and select the desired application from the given list or select Look for another app on this PC if you don’t see it listed. There’s no save button; the change happens instantly.
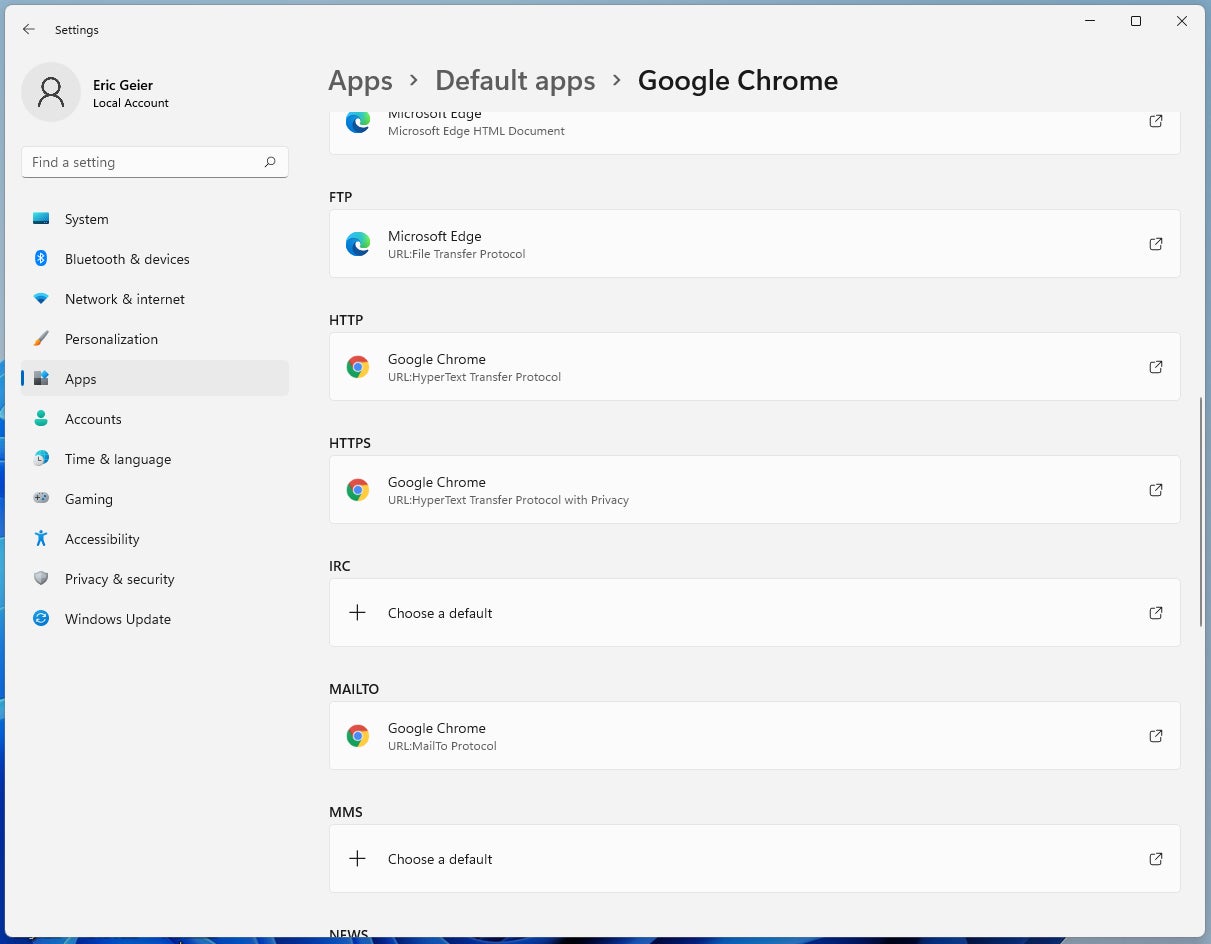
Many Windows users, for example, prefer to use a different browser from the default, Microsoft Edge. To change your default web browser away from Edge, you can actually select any web browser from the “Default apps” list. Just be sure to change at least the following file or link types to use your desired browser:
- .htm
- .html
- HTTP
- HTTPS
- MAILTO (if you use web mail only and don’t use Microsoft’s Outlook or Mail apps)
 Eric Geier / IDG
Changing the default browser (Microsoft Edge) to Google Chrome.
Eric Geier is a freelance tech writer — keep up with his writings on Facebook or Twitter. He’s also the founder of NoWiresSecurity providing a cloud-based Wi-Fi security service, Wi-Fi Surveyors providing RF site surveying, and On Spot Techs providing general IT services.