

On the surface, Android and privacy might not seem like the most natural of bedfellows. Google is known for its advertising business, after all — it’s how the company makes the lion’s share of its money — and it can be tough to square the notion of data collection with the concept of carefully controlled information.
In actuality, though, Google gives you a good amount of authority over how and when it taps into your Android-associated info. (And even at its worst, the company never shares your data with anyone or sells it to third parties, despite some broad misconceptions to the contrary.) Ultimately, it just comes down to a matter of educating yourself about the possibilities and then determining what balance of privacy and function makes the most sense for you.
And you’d better believe the onus falls squarely on you to do that. By default, most Google privacy valves are opened up to the max — to the setting that allows the most feature-rich and ad-supporting experience and that uses your data in the most free-flowing manner possible. That isn’t necessarily a bad thing, but it may or may not be what you want, particularly from a professional perspective. And navigating the layers of settings, not only with Google itself but also with the various third-party services that interact with your phone, is often easier said than done.
Well, consider this your guide to the labyrinth. I’ll take you through a series of 14 Android privacy adjustments, starting with the easiest and most broadly advisable tweaks and ending with higher-level tactics for the most privacy-minded users. Along the way I’ll explain what each setting accomplishes, how long it should take to implement, and how much inconvenience it’ll cause.
Make your way through the list and think thoroughly about each item’s pros and cons — and before you know it, you’ll have a deliberate Android privacy plan that’s less about defaults and more about your own preferences.
Section I: Easy Android privacy adjustments that are advisable for anyone
1. Uninstall used apps
- Time required: 2 minutes
- Inconvenience level: 0/10
This first Android privacy step is a no-brainer and something everyone should do periodically: Look through all of the installed apps on your phone and remove anything you haven’t used in the past month or two (so long as it isn’t required by your IT department, of course!). Unused apps not only take a toll on your device’s resources; they also have the potential to leave open doors to sensitive info that’d be better off closed.
So open up your app drawer and mull over every icon you see there. If you haven’t used an app in a while, press and hold its icon and select “Uninstall” — or, if you don’t see that as an option, select “App info” and then find the Uninstall button. On older Android versions, you might have to drag the app toward the top of the screen to access those same options; once you see them appear at the top of your display, drag the app up to that area and then release it.
With apps that came preinstalled on your phone out of the box, you may not always be able to uninstall but can often disable them — with the option to do so appearing either in that same long-press menu or within the aforementioned “App info” screen. That won’t get the app off your device entirely but will stop it from running and actively accessing any of your information.
2. Check on apps with access to your Google account
- Time required: 2 minutes
- Inconvenience level: 0/10
In addition to the phone-specific permissions, apps and services can request access to certain types of data within your Google account — things like your contacts, your Gmail messages, or even your Google Drive storage. Again, such access may be completely warranted and no cause for concern (and it’d be present only if you explicitly authorized it at some point), but once you’re no longer actively using the associated app, you don’t want to leave that pathway open.
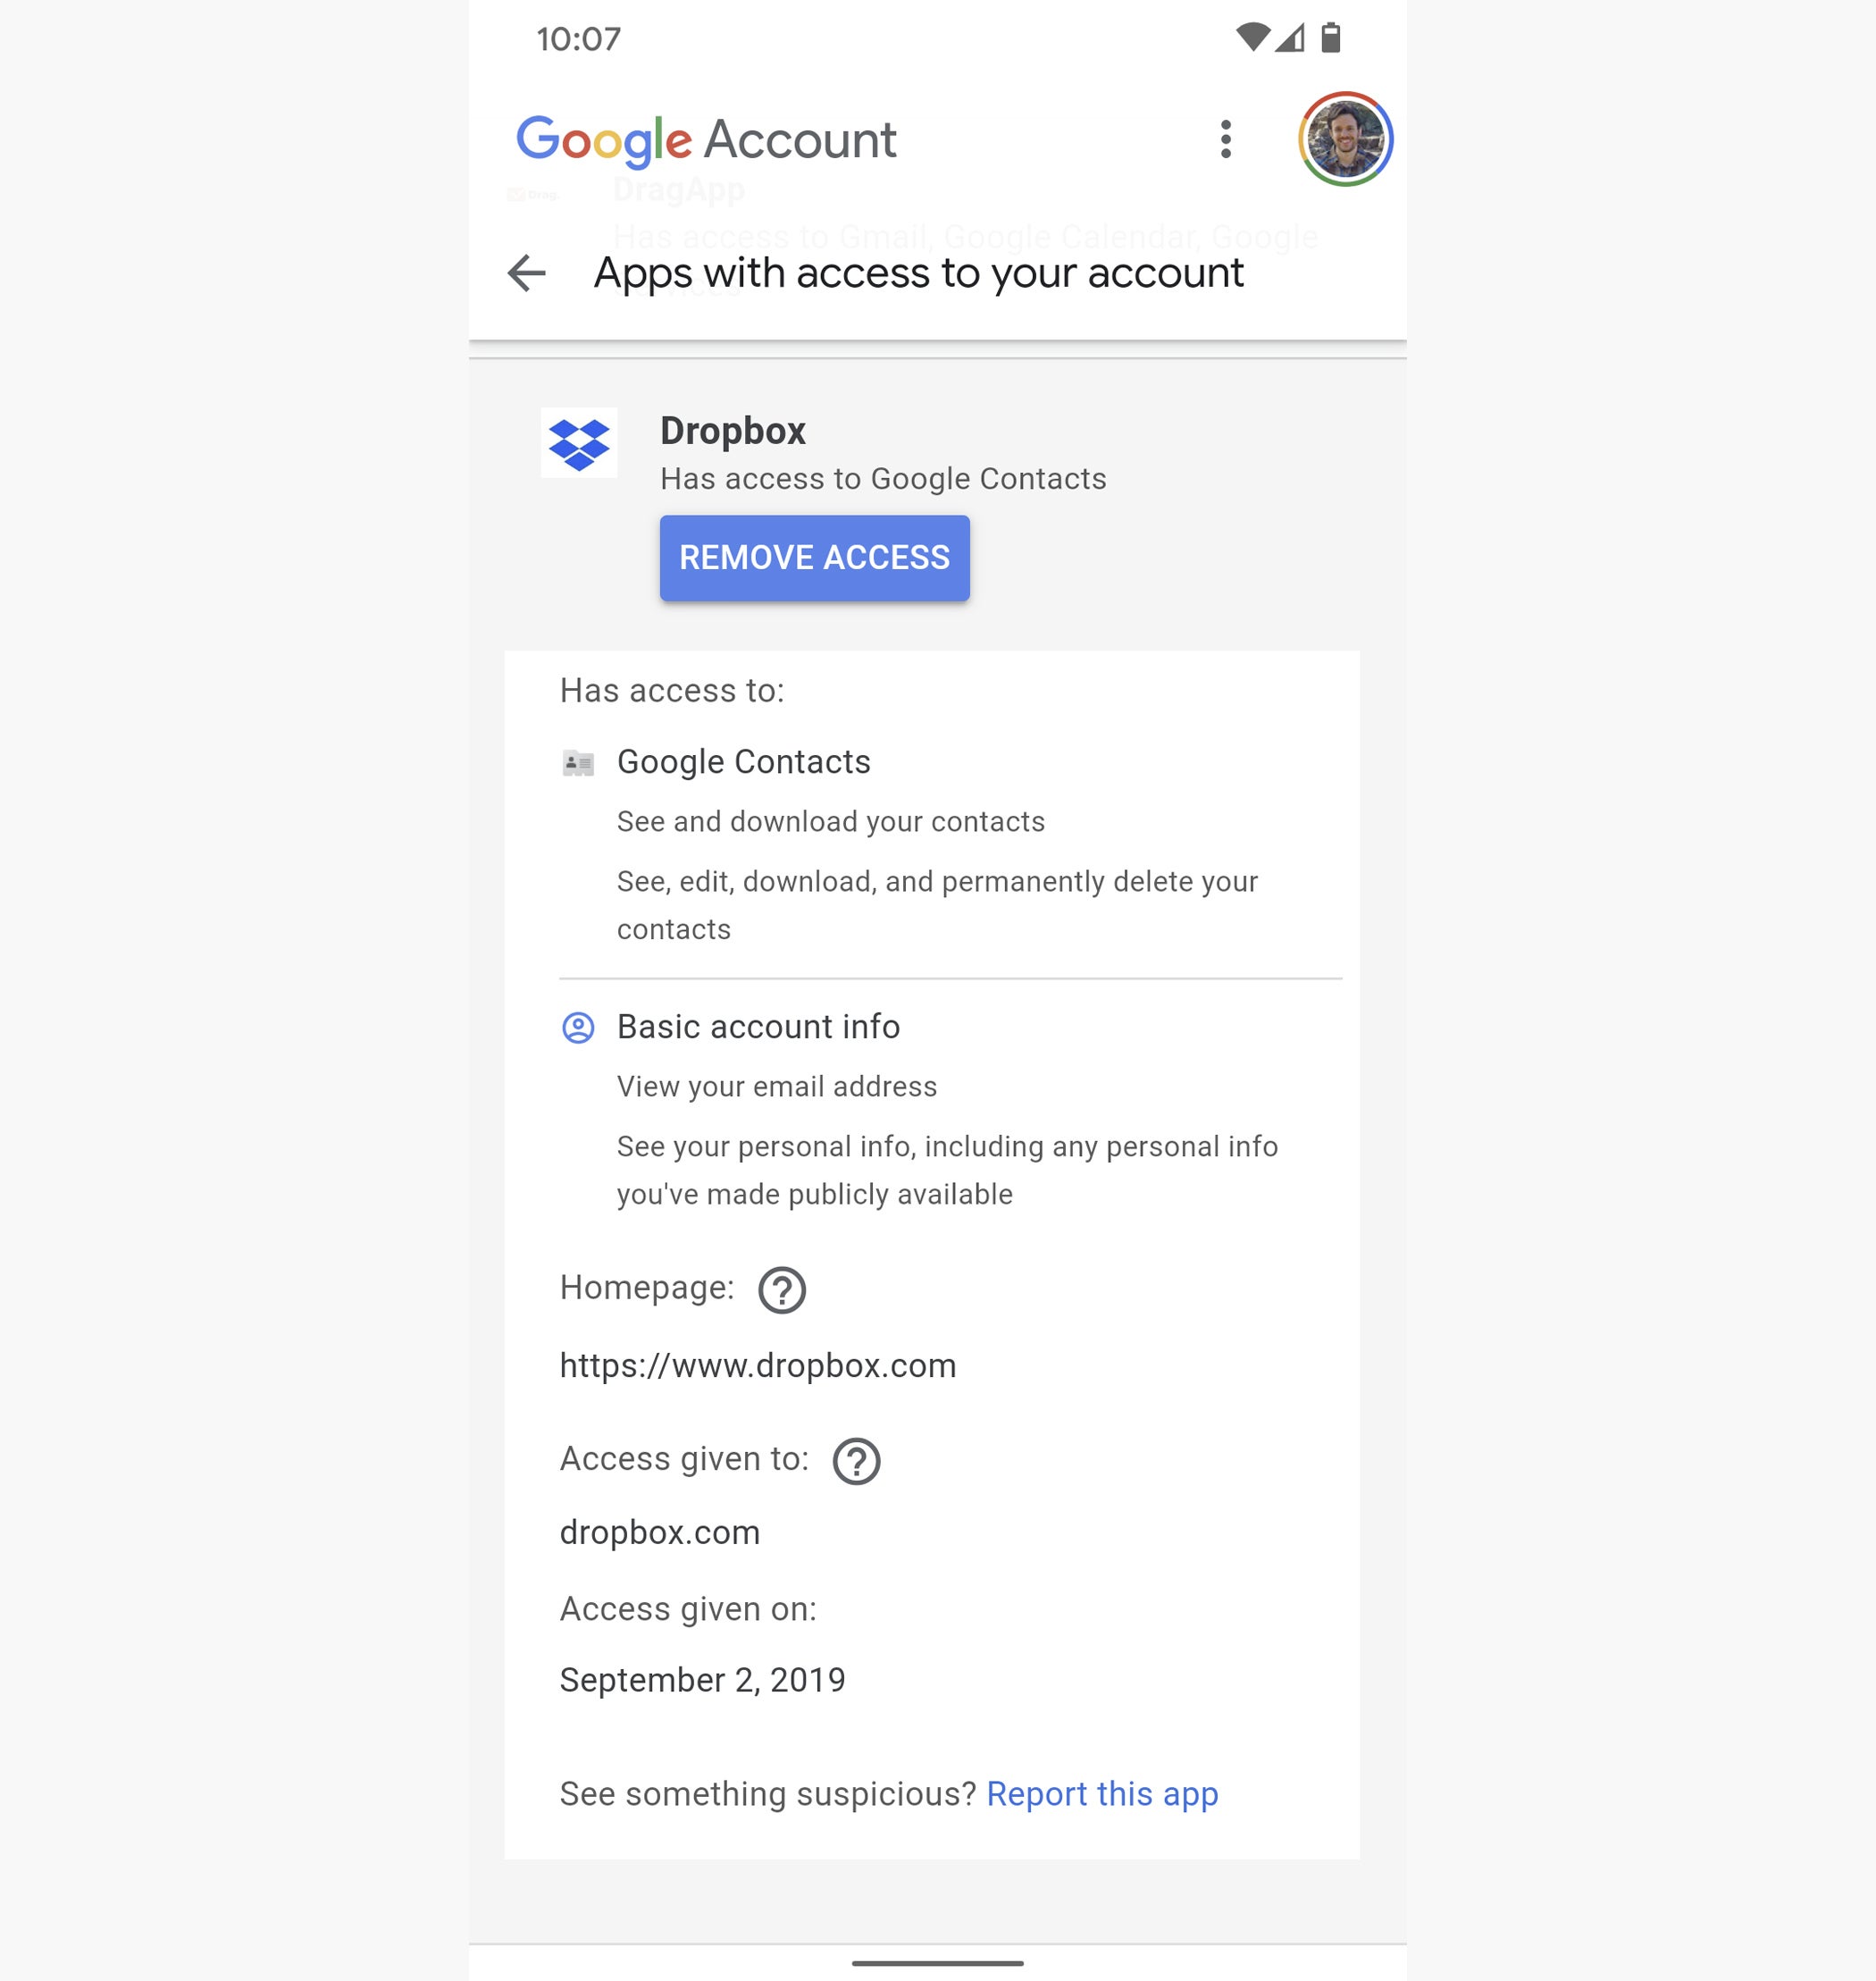
Luckily, it’s an especially easy one to close — and another painless privacy step worth performing periodically. Just open up the Google account permissions page and look over everything in the list. For any items you no longer use or don’t recognize, click their title and then click the blue Remove Access button that appears alongside ’em.
 JR Raphael/IDG
Clamping down on third-party app access to your Google account is a simple way to secure forgotten pathways and strengthen your privacy.
3. Revisit your Android app permissions
- Time required: 5 minutes
- Inconvenience level: 0/10
Now that we’ve taken care of apps you’re no longer using, let’s think about the ones you are still actively engaging with — because even those may have permissions you once granted but no longer require.
So open up the Apps & Notifications section of your system settings (or the Apps section, if you’re using a Samsung phone), tap the word “Advanced,” and then tap the line labeled “Permission Manager” (which will be tucked away within the three-dot menu icon in the upper-right corner of the screen on Samsung devices). Then, one by one, tap on each permission type in the list, look over the apps that have access to it, and consider whether each app’s access still strikes you as being necessary.
If you see something that seems questionable, tap the name of the app and then change its setting to “Deny.” There’s a chance the app will stop being able to perform one of its functions as a result, but at worst, it’ll prompt you to re-enable the permission at some future moment and you can then reconsider it.
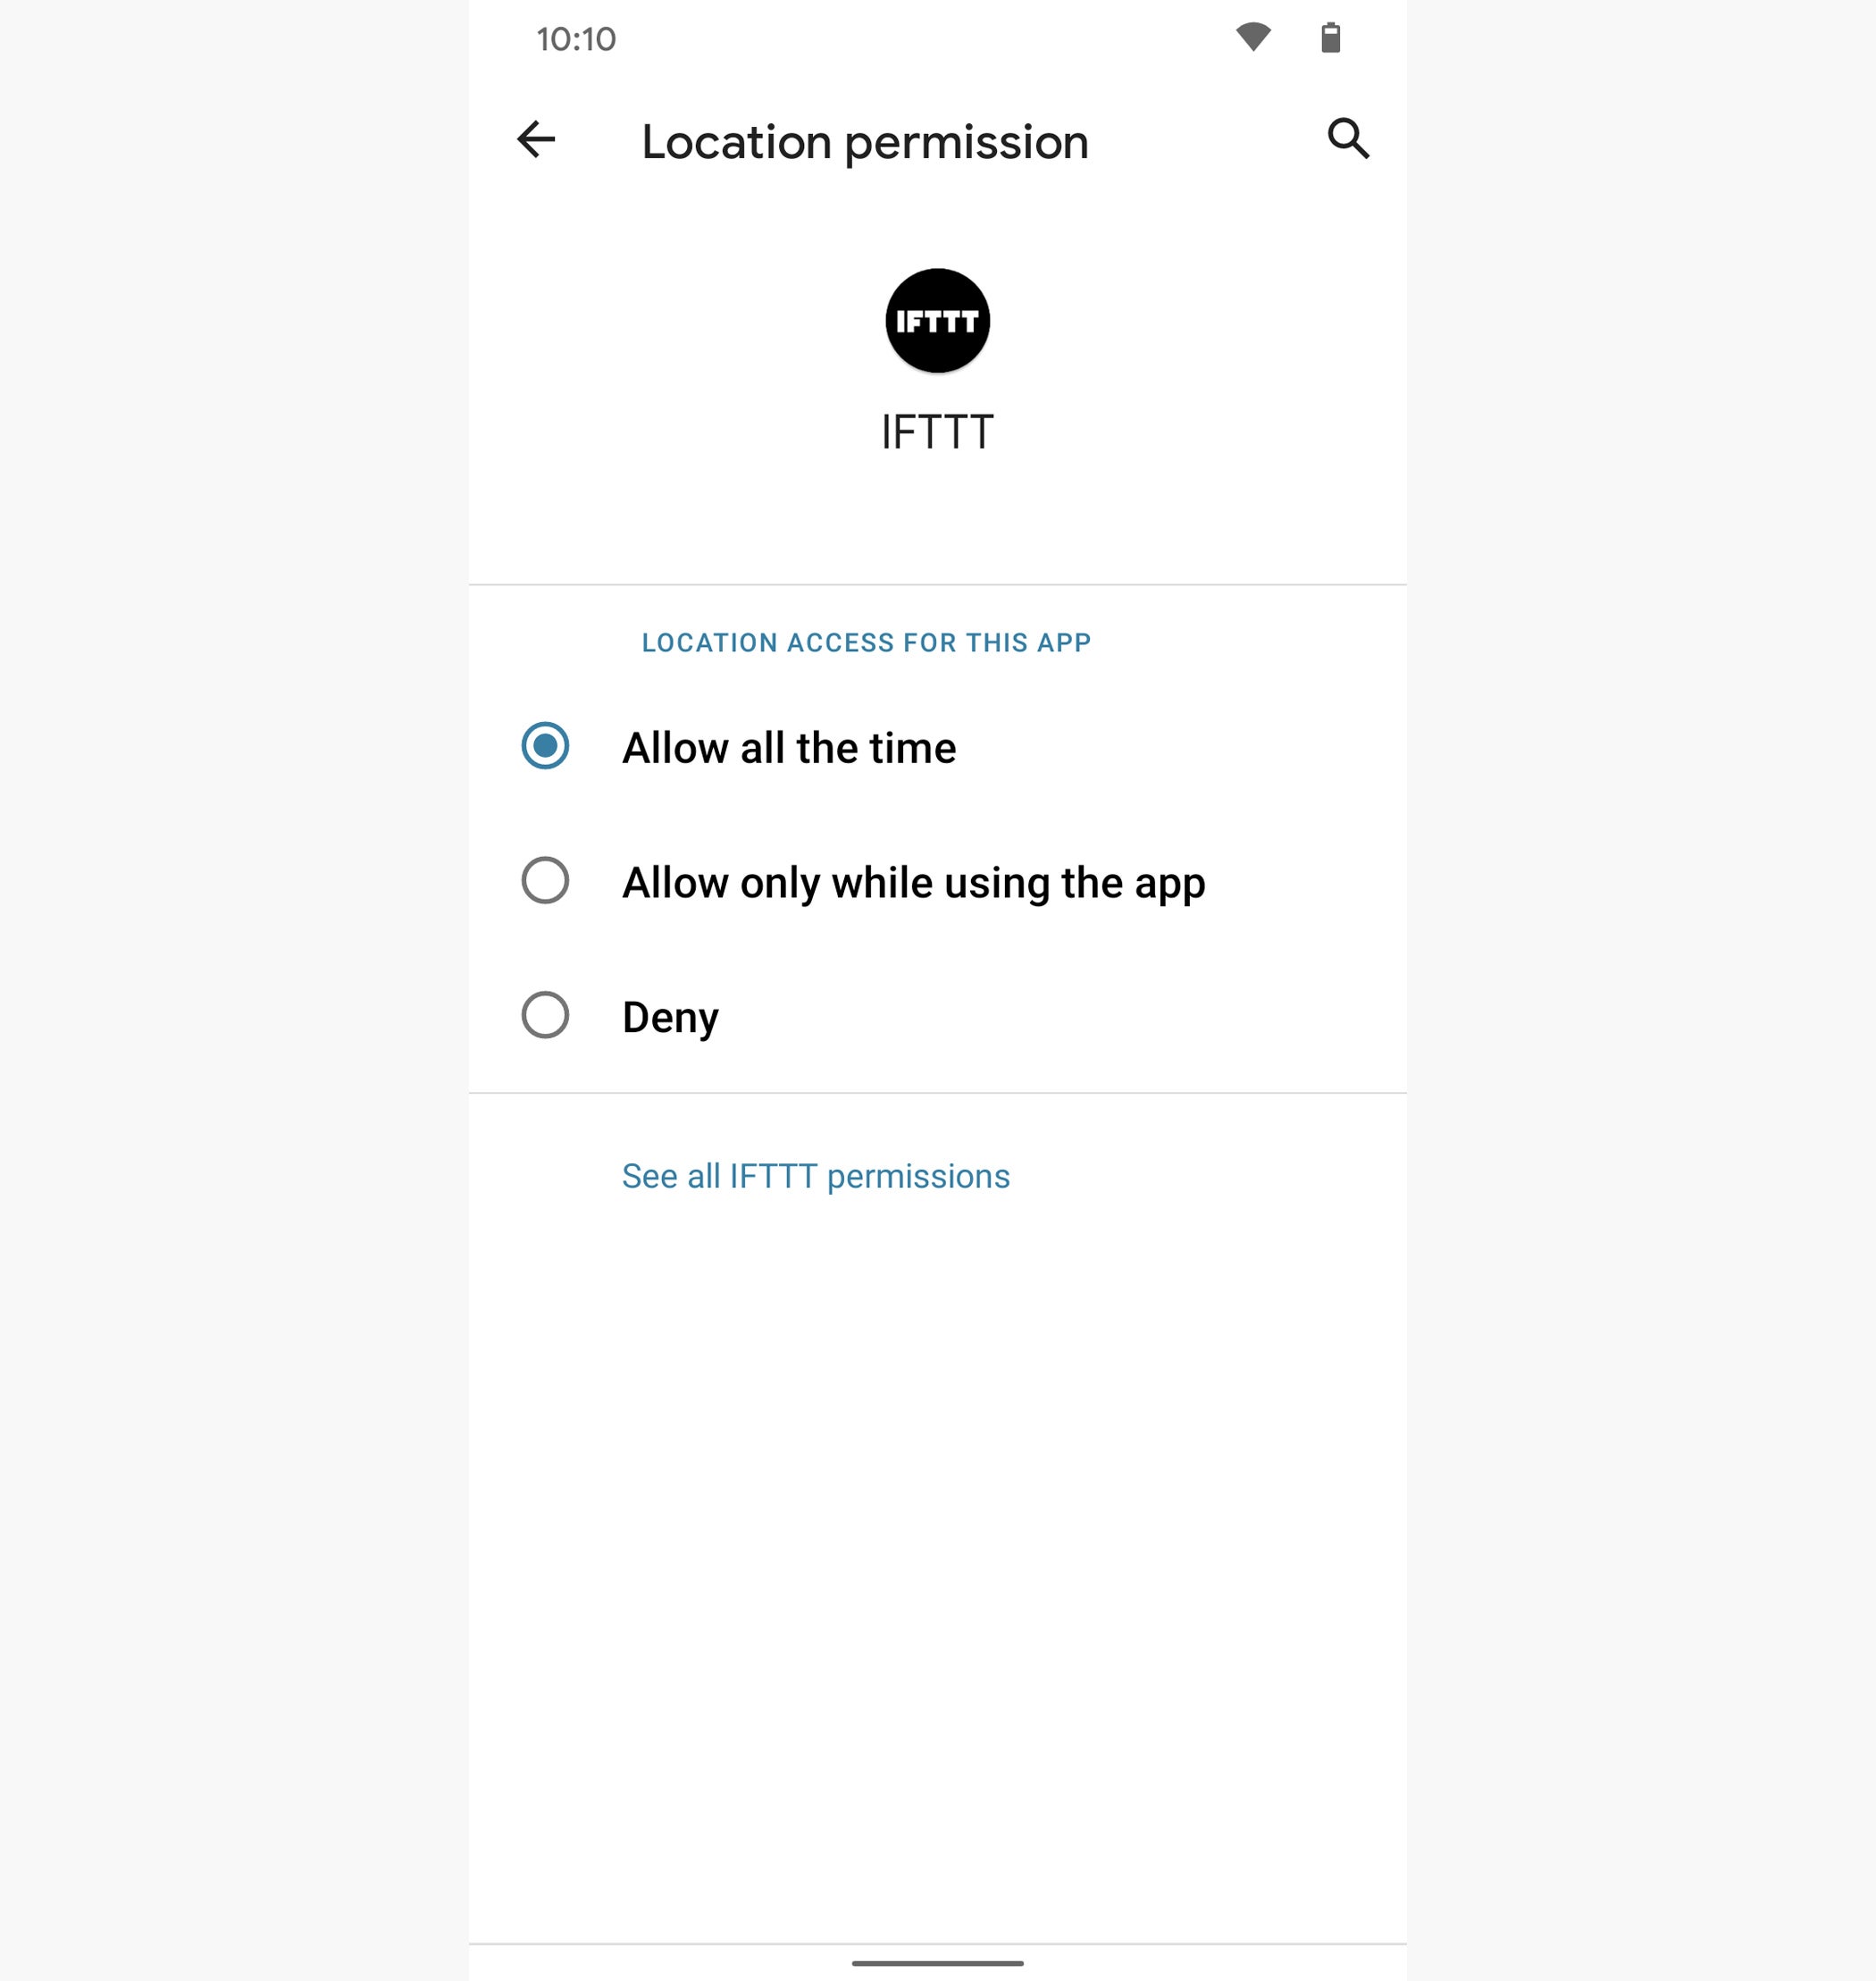
An important footnote to this: If you’re using Android 10, pay extra attention to the “Location” section of permissions. As of that release, you can get more nuanced with that permission and allow an app to access to your location all the time or only when the app is actively in use, which gives you a lot more flexibility than the traditional all-or-nothing approach — but, critically, it’s up to you to make any changes to apps that were granted an all-the-time location permission before Android 10 arrived on your phone.
 JR Raphael/IDG
As of Android 10, you can take a more granular approach to when and how an app is able to access your location, but it’s often up to you to make the change.
4. Clamp down on your lock screen privacy
- Time required: 1 minute
- Inconvenience level: 1/10
By default, Android is typically set to show all of your notification content on your lock screen — and that means if someone else picks up your phone, they might see sensitive info without even having to put in a PIN, pattern, or passcode.
Change that by opening up the Security section of your phone’s settings, selecting “Lock screen,” and then switching its setting to either “Show sensitive content only when unlocked” or “Don’t show notifications at all,” depending on your comfort level. (On a Samsung phone, you’ll instead open the standalone Lock Screen section of the system settings and then tap “Notifications” to find a similar set of options.)
5. Opt out of Samsung’s data-sharing systems and consider avoiding its apps
- Time required: 5 minutes
- Inconvenience level: 1/10
If you have a Samsung phone, listen up: The company is probably selling your data — not just using it internally and privately but outright selling it to third parties (and without being even remotely up-front about what’s going on).
As I reported earlier this year, Samsung’s Galaxy phones have a disconcertingly intricate system for collecting different types of data from people who use its devices and then generating extra revenue by selling that data to other companies. And clearly, that’s not what you want to have happening.
So at the very least, opt of this obnoxiousness everywhere you can — most importantly within the Privacy Control section of the Samsung Pay app (look for the “Don’t sell data” option) and within the “Customization Service” options inside the Samsung Calendar app’s settings, the Samsung Internet browser’s settings, and the Samsung Contact app’s settings — and if you really want to be proactive about your privacy, just ditch Samsung’s default apps altogether.
You’ll get better all-around experiences by turning to other Android apps for those same purposes, anyhow, and you’ll have an easier time syncing or moving your data to non-Samsung devices now and in the future. And, y’know, you won’t be subjecting yourself to sneaky selling of your personal and/or company information with no discernible benefit to you.
Section II: Moderately advanced Android privacy modifications some people may want to perform
6. Turn off Google’s ad personalization system
- Time required: 2 minutes
- Inconvenience level: 2/10
Google makes its money by showing ads around the internet — that’s no secret. And it uses data about you to select ads that are, in theory, catered to your interests and more likely to be relevant to you. It never shares your data with advertisers, as mentioned at the top of this story, and all of the matching happens within Google and in a completely automated, machine-driven sense.
At the end of the day, you’re bound to see some of those ads no matter what you do — so there’s an argument that having the ads be catered to your interests at least creates the potential for them to be appealing as opposed to just random. But if you’d rather not have your data used for that purpose, you can turn the personalization system off.
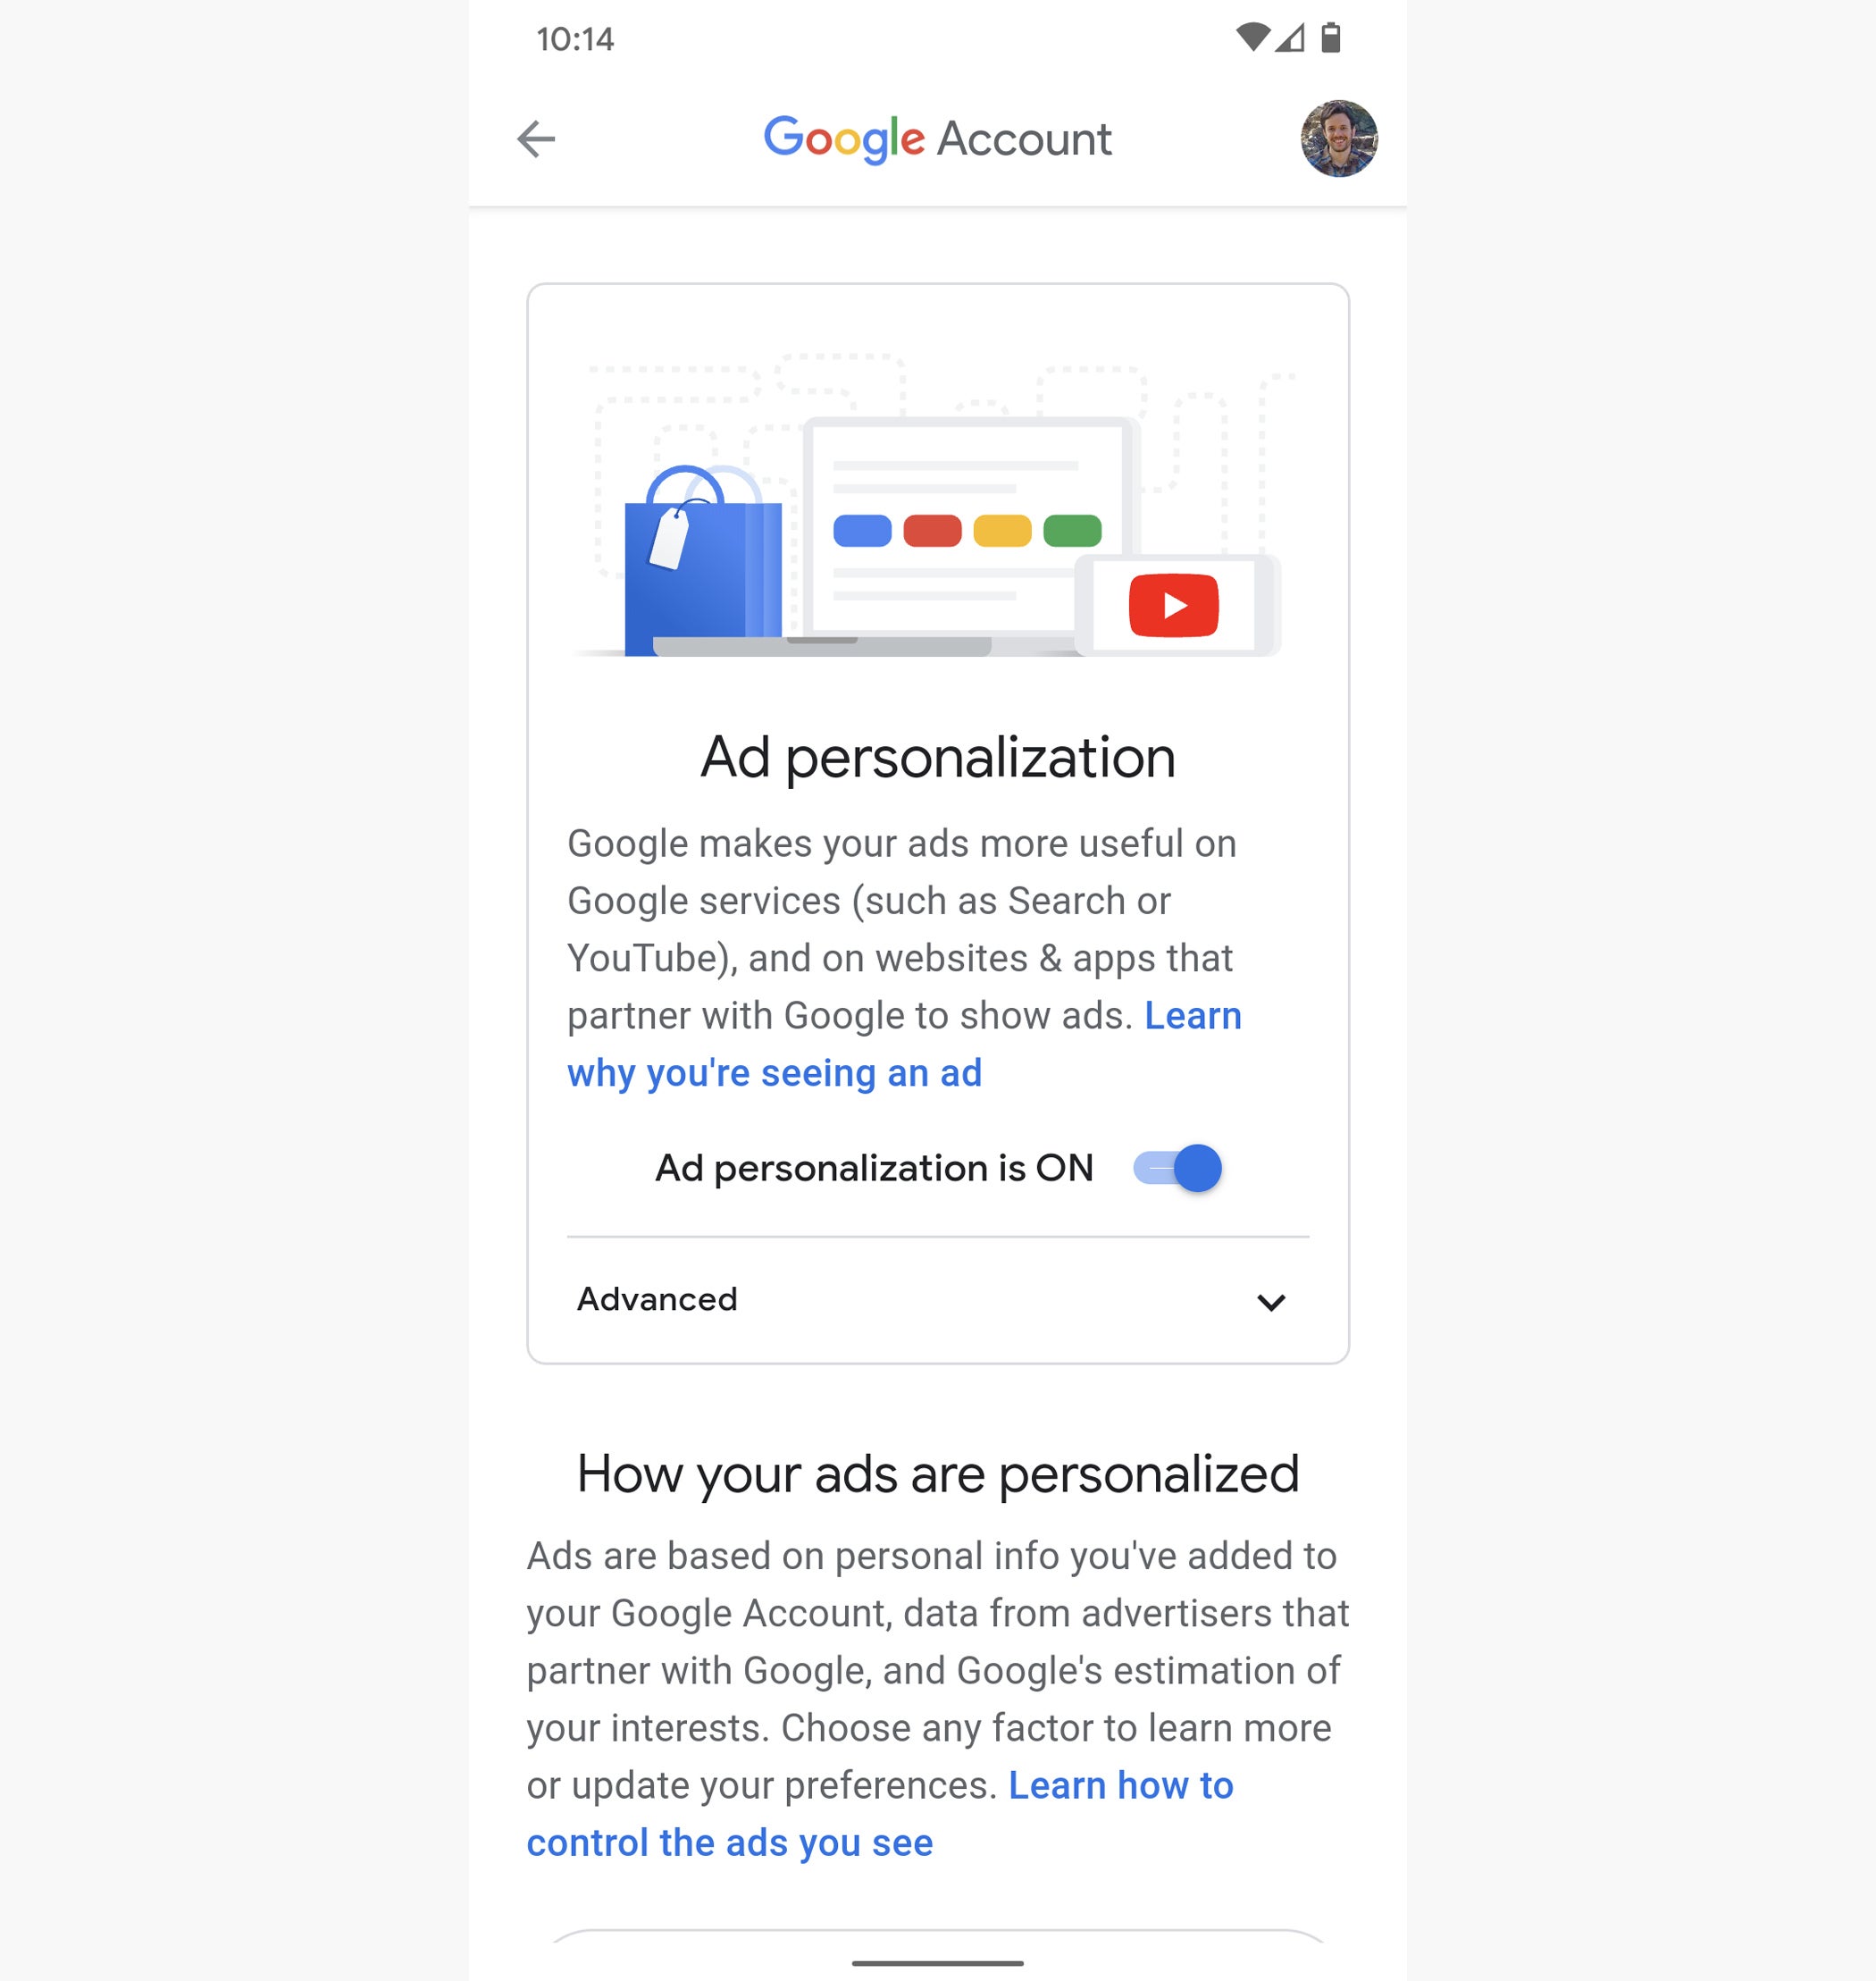
Just go back into the Google section of your system settings, tap the Manage Your Google Account button, and then tap the Data & Personalization tab. Scroll down to the Ad Personalization box and tap the “Go to ad settings” link, then turn off the toggle on the screen that comes up and confirm you want to make the change.
 JR Raphael/IDG
Google lets you opt out of its ad personalization system entirely, if you’re so inclined.
There’s just one more thing to check: See that profile picture in the upper-right corner of that same screen? Tap it and see what other accounts you have connected to your device. Each Google account has its own separate settings, so you’ll have to go through ’em one by one to make sure the ad personalization option is disabled everywhere.
7. Start using a VPN
- Time required: 5 minutes
- Inconvenience level: 2/10
If you’re using a company-connected phone, there’s a decent chance your employer is already providing you with a corporate VPN (virtual private network). But if not, it’s probably worth your while to set one up on your own.
A VPN, in short, keeps all the data you send and receive on your phone encrypted, private, and secure. Without it, someone could snoop on your connection and intercept sensitive info without your knowledge. (It’s an especially common problem when public Wi-Fi networks are involved.)
The Google Fi wireless service has its own built-in always-on VPN option, which is free, secure, and simple as can be to use. If you’re using any other carrier, you’ll need to turn to a third-party provider to get that same functionality. NordVPN and TunnelBear are two favorably reviewed, reputable options; NordVPN costs $12 a month if you pay as you go or $7 a month if you pay for a full year of service up front, while TunnelBear runs $10 a month as you go or $5 a month with a full-year payment.
Both are minimal hassle once set up on your phone and shouldn’t change much about the way you work, but they do require that ongoing payment — hence the inconvenience level score. And both are more advisable to use than most free or dirt-cheap VPN options you’ll encounter, as those frequently mishandle data and stick you with unreasonably low usage limits in order to make up for their low costs.
8. Add extra encryption onto especially sensitive files
- Time required: 3 minutes
- Inconvenience level: 3/10
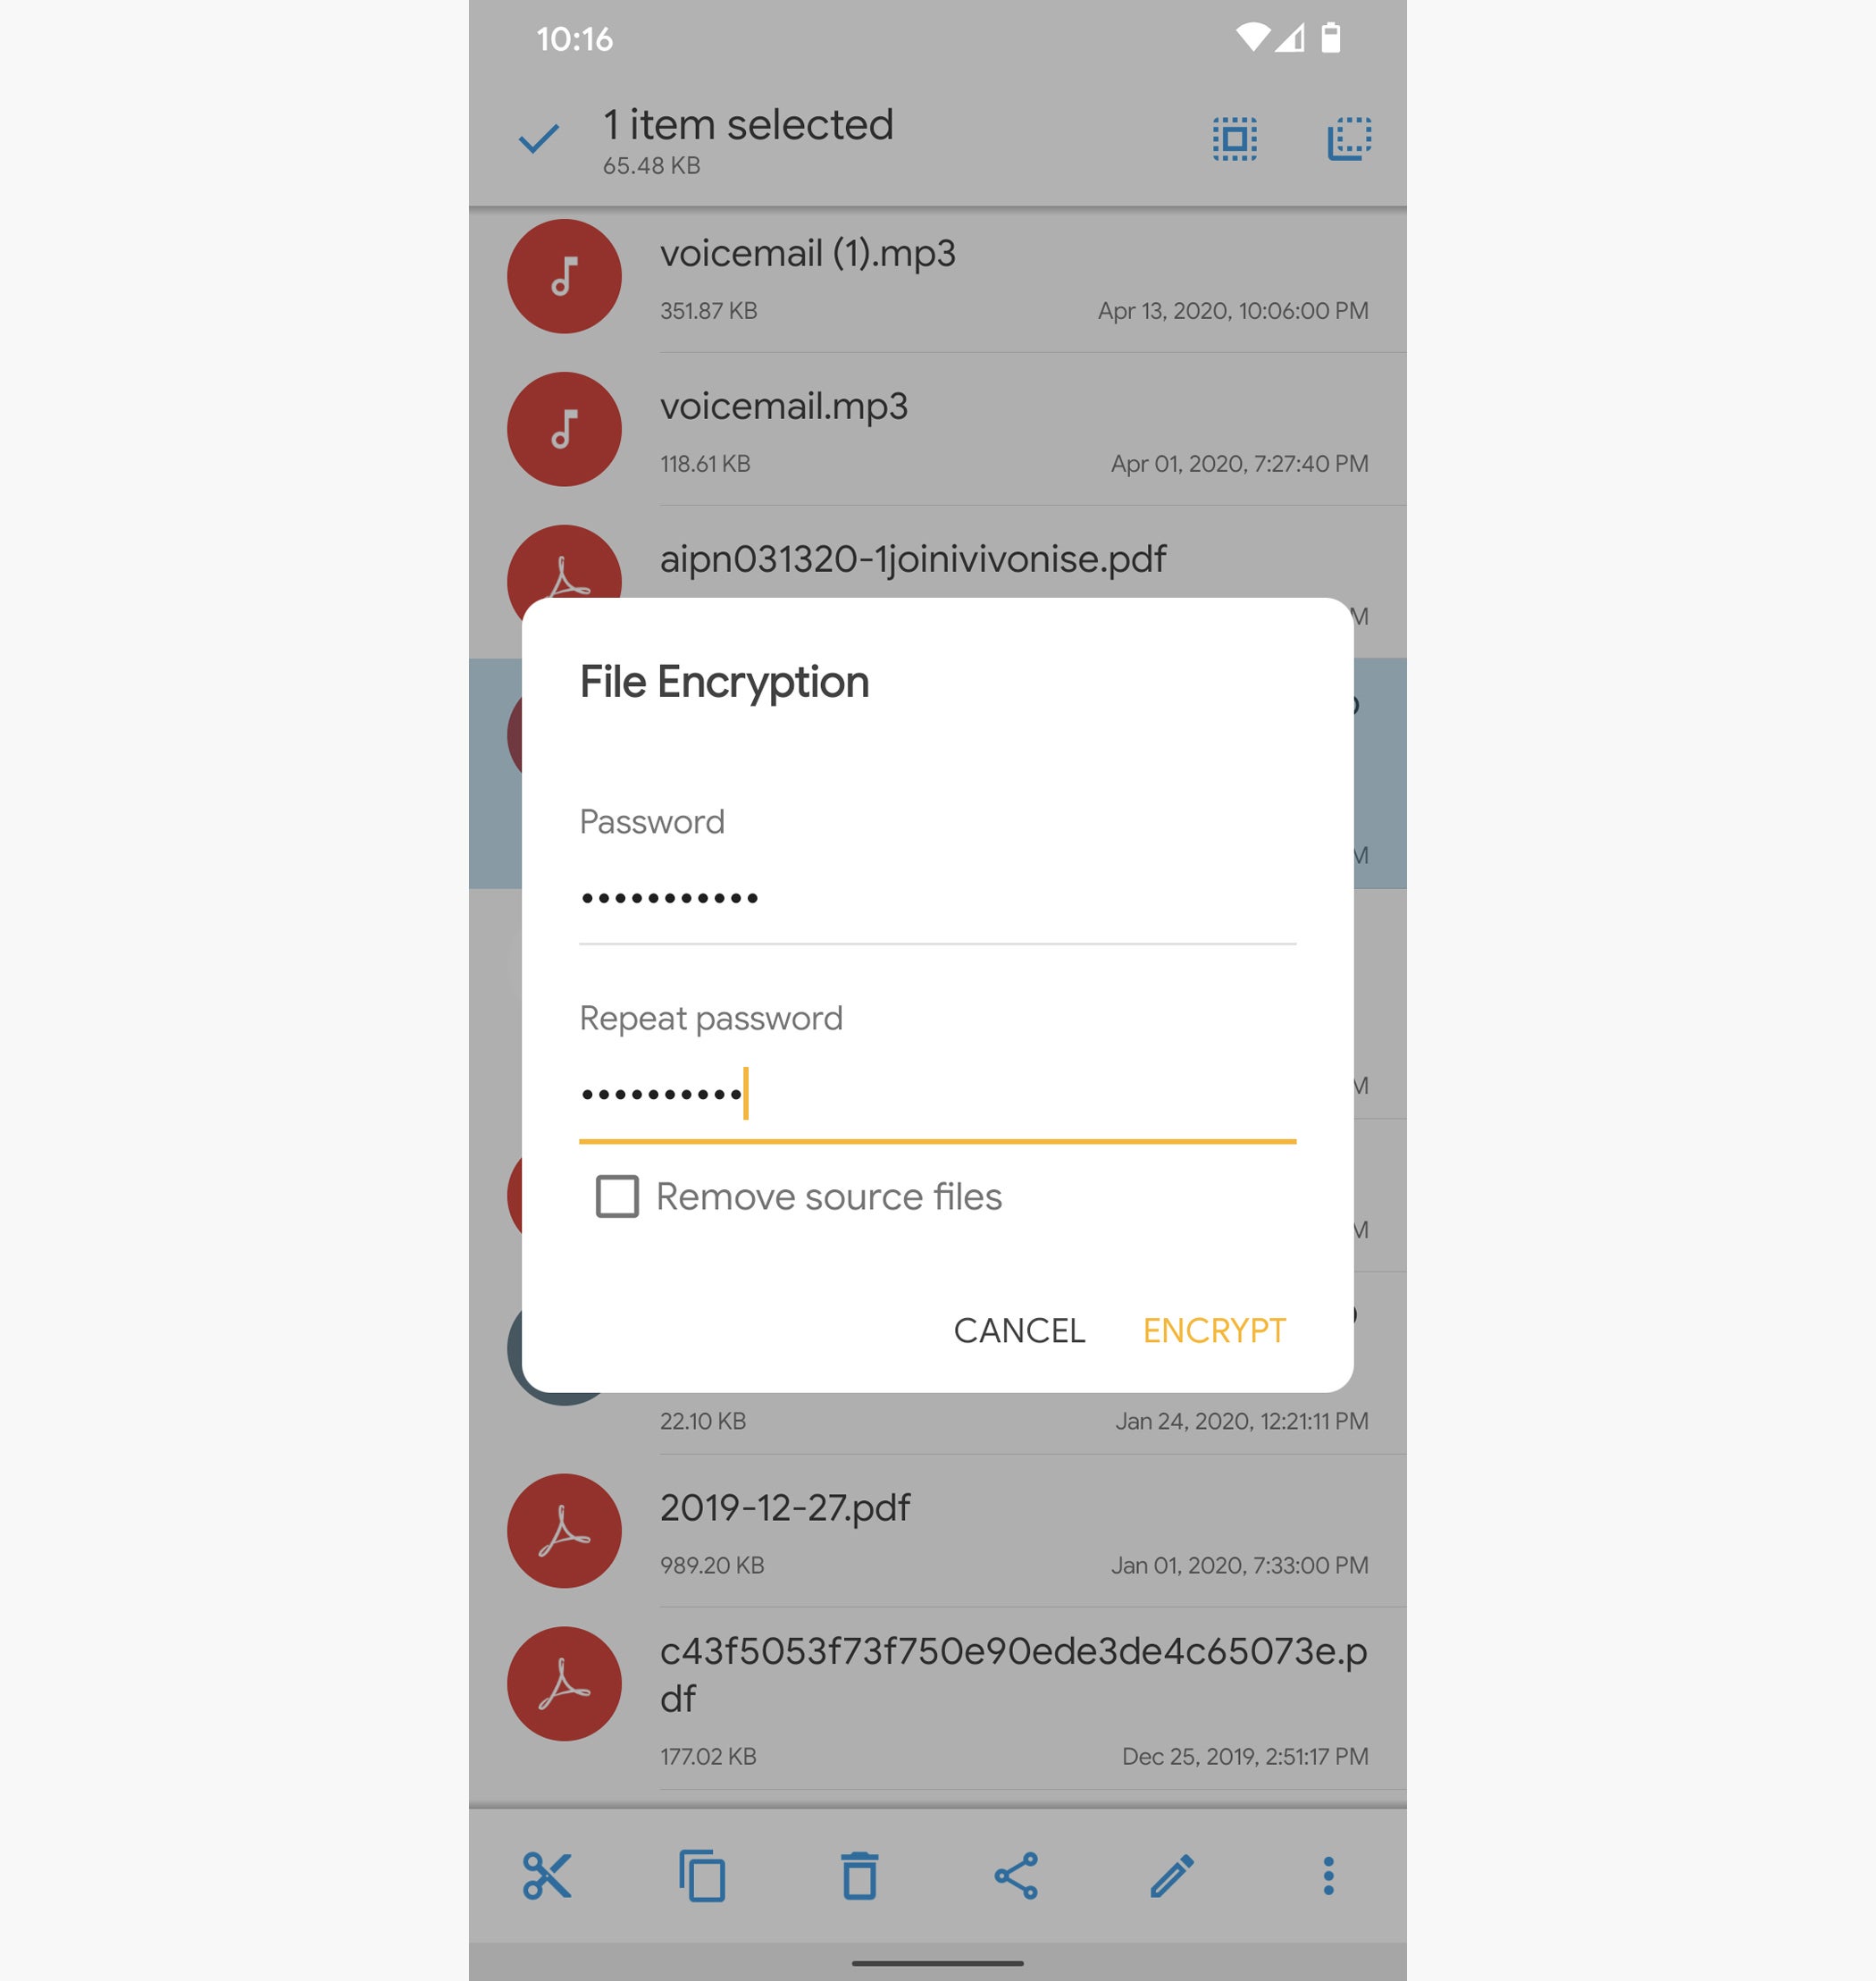
Give sensitive files on your phone an extra layer of encryption with Solid Explorer, which costs $3 after a two-week trial. The app lets you encrypt any file so it can be accessed only after your personal password or biometric authentication has been applied. That does mean you’ll have to unlock the file every time you want to view or share it, which can be mildly annoying — but depending on what type of material you have on your device, it might be worth it for the added peace of mind.
 JR Raphael/IDG
Solid Explorer lets you add an extra layer of encryption onto especially sensitive files.
9. Rethink your browser setup
- Time required: 4 minutes
- Inconvenience level: 4/10
Google’s Chrome Android browser has all sorts of impressive features, but many of them inherently require some manner of privacy tradeoff in order to work. For instance, you can easily find any page you visited on any device with a super-fast search — but in order for that to happen, Google has to maintain a cross-device record of every site you visit.
Only you can decide whether the conveniences outweigh the privacy tradeoffs, but if you want to make your Android web browsing as private as possible, Mozilla’s new Firefox Android app is a great way to do it. (The current version of the app is still under development, so the beta version is the one you’ll want for now.) The app has a single-toggle option to let you automatically delete your entire browsing history every time you end a session, and it includes a variety of “enhanced tracking protection” features that make it incredibly easy to block scripts, cookies, and other forms of tracking around the web.
![]() JR Raphael/IDG
JR Raphael/IDG
The Firefox Android app offers a host of options for blocking tracking systems and increasing your mobile browsing privacy.
If you’d rather stick with Chrome, there are some things you can do to crank up its privacy protection. Start in the Sync and Google Services section of the app’s settings, where you can scale down or even completely disable how different forms of your browsing data are shared with Google. Just remember that the more you disable, the more sacrifices you’ll make in terms of convenience — particularly when moving from your phone to your computer and maintaining a common collection of settings and history.
 JR Raphael/IDG
You can disable lots of Chrome features that’ll increase your privacy — though at the cost of convenience and cross-device consistency.
Other places to look include the app’s Payment Methods section, where you can tell it not to save or store any of your payment information; the Privacy section, where you can prevent sites from seeing if you have payment info saved and also opt out of having Chrome preload pages for faster browsing; the Site Settings section, where you can prevent all sites from creating or interacting with cookies; and the Lite Mode section, where you can turn off the Android-specific data saver function that routes your browsing traffic through Google’s servers in order to compress pages and make them more efficient to load.
NEXT PAGE: Location history, email and messaging protections, and more