


Apple has long positioned itself as a company that believes in your right to privacy. Here is how to use the privacy tools it provides with macOS for desktop Macs.
Use a strong passcode
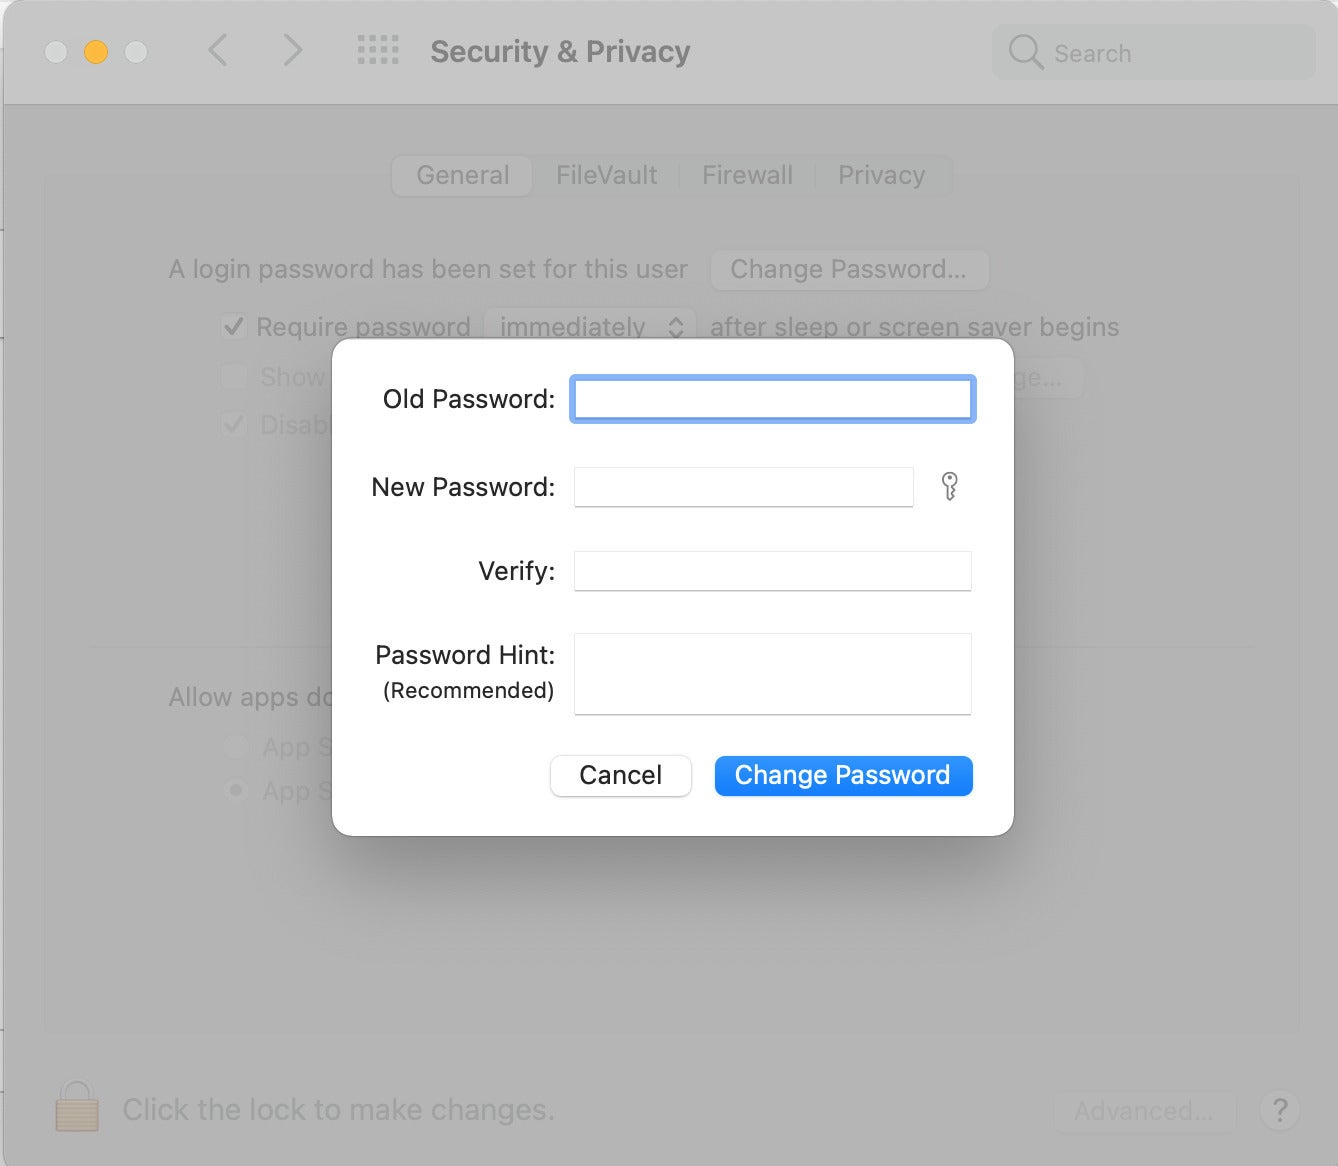
To secure your Mac, all of your data, and your privacy, it is essential to create a strong alphanumeric login password. The temptation to use something short or easy to remember is understandable, but if your Mac goes missing, your life is on show. So visit Security & Privacy>General and tap Change Password to pick something more challenging.
 Apple
AppleTo use a stronger password, go to macOS’ Security & Privacy system preference to make changes.
If you have an Apple Watch, you can enable this to unlock apps and your Mac in this same preference pane; doing so provides a layer of biometric authorization to secure your Mac even more.
If your Mac has a TouchID button, it makes sense to use of it. It makes no sense at all to use weak passwords for logins if you value your privacy.
Convenience versus privacy
While you’re in Security & Privacy>General tale a look at the Require Password checkbox. This sets the time you can leave your Mac inactive before you are required to use the password again. While it’s tempting to set this a little longer if you are using a complex login, doing so is a false economy if you frequently use your Mac in a public place.
Of course, setting your Mac so it locks after a second’s inactivity can be a little illogical when you’re attempting to get work done; I tend to set this feature to five minutes and make sure to manually lock my Mac when I turn my back.
The fast way to Lock your Mac
Apple now offers a menu item that will lock your Mac on request. Open Apple menu>Lock Screen…
Turn on FileVault
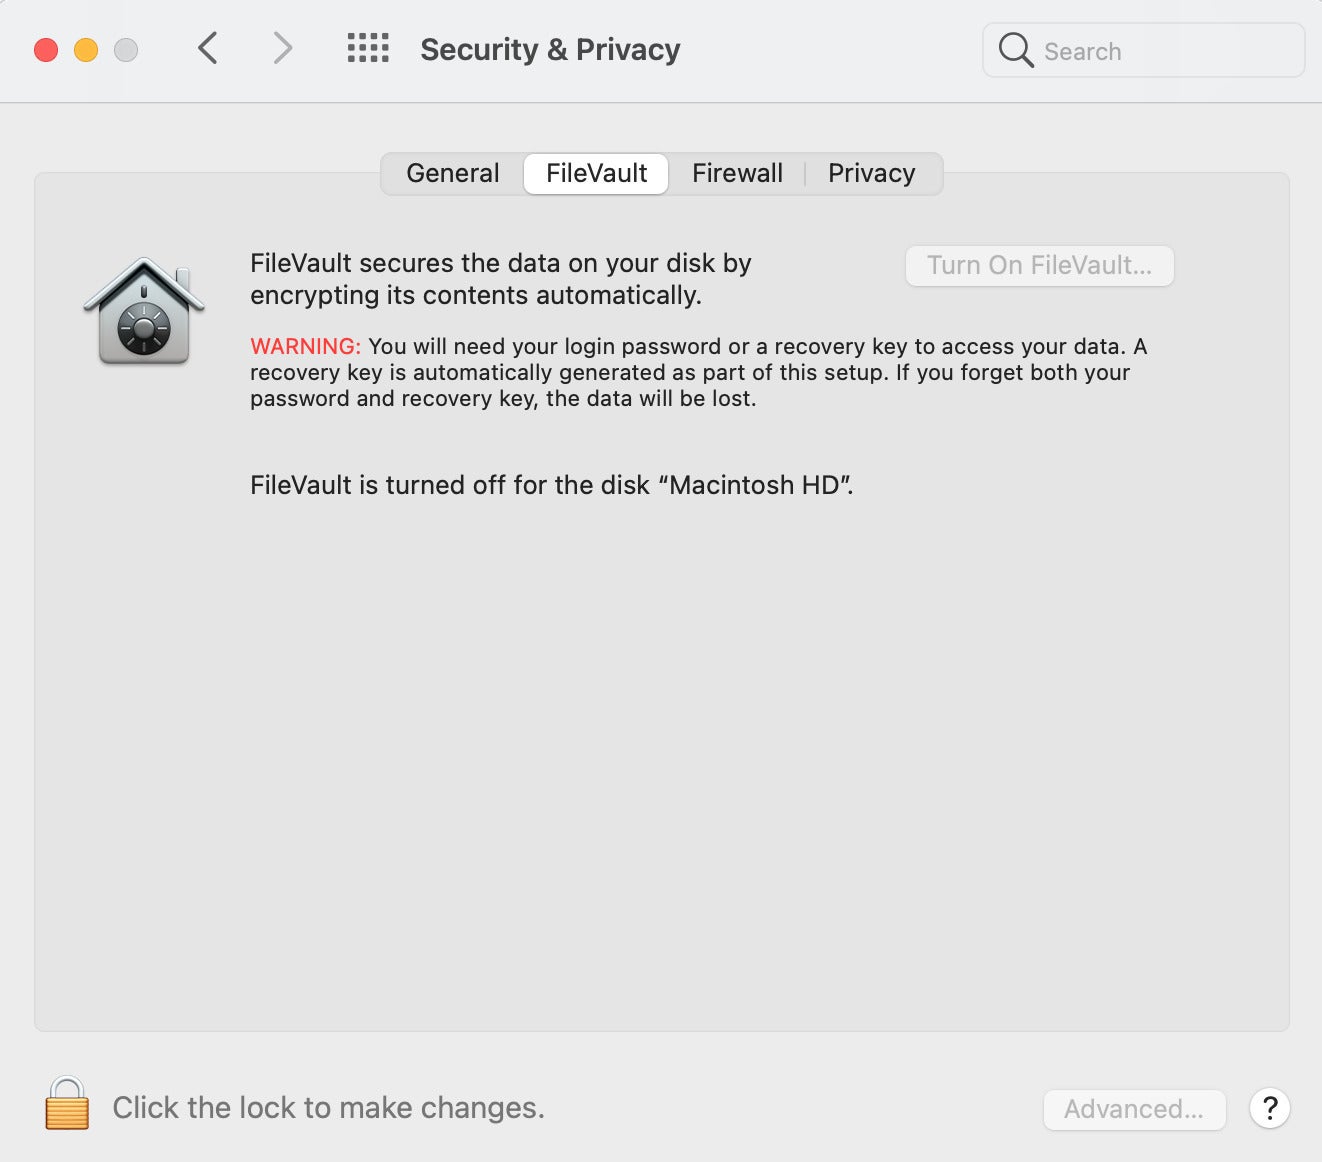
You should ensure FireVault protection is active. This encrypts all of the contents of your Mac to provide additional protection so your data won’t be exposed in the event you lose control of your Mac. Enable this in Security & Privacy>FileVault.
 Apple
AppleFileVault provides an extra layer of security and privacy.
Use the firewall
Macs have a built-in firewall and you really need to use it to protect yourself against network intrusion. Open System Preferences>Security & Privacy>Firewall to enable this. While you are there, you should also enable Stealth Mode. This prevents your computer from responding to or acknowledging attempts made to access it from the network using tools like Ping. This makes it a lot harder to target your Mac when you’re using a public access point, for example.
Always use a VPN
Mac users should make use of a VPN (virtual private network), as these make it far more difficult for others to hack or track your internet traffic. If your company offers a VPN, then use it. If not, it’s worth investing in a reputable provider, as some free VPN services cannot be trusted. Some of the more reputable services include: NordVPN, CyberGhost, ExpressVPN, Windscribe and TunnelBear.
Choosing a good provider matters since you must verify the service they provide is in line with any enterprise security policy.
Enable two-factor authentication
Another important protection for the privacy conscious is two-factor authentication (2FA) for your Apple ID. With this enabled, you receive a confirmation code whenever someone attempts to login using your Apple ID and will have to authorize such access.
This is important as it helps keep others out of your iCloud and also prevents others undermining FileVault protection on your Mac. Open System Preferences>Apple ID>iCloud>Password & Security and ensure 2FA is On and check that the correct phone number is provided.
In Safari, use Private Browsing mode
One way to prevent rogue apps from grabbing data they find about you in your Safari History is to use Private Browsing mode. When you do, Safari won’t remember which pages you visit:
- In Safari tap File>New Private Window, or
- Tap Shift-Command-N.
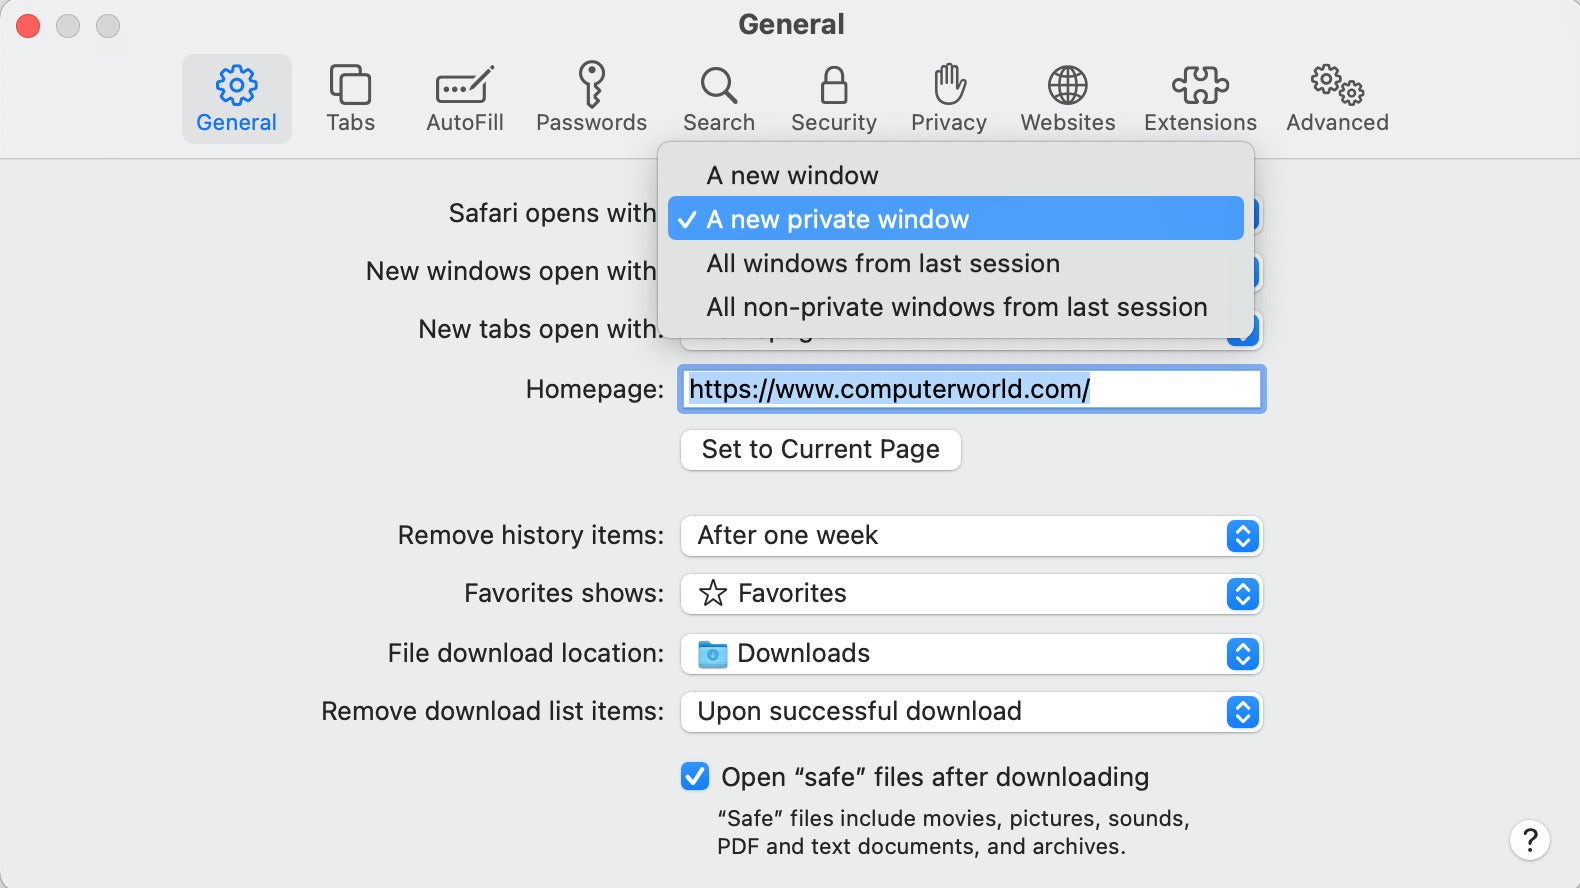
- You can also require that Safari always opens windows in Private Browsing mode. Open Safari>Preferences>General and in “Safari opens with” select “A new private window.”
 Apple
AppleYou can require that Safari always opens windows in Private Browsing mode in browser preferences.
Use Safari’s Privacy report
Safari on the Mac now provides a Privacy Report for each website you visit – just tap the Shield icon beside the address bar in Safari. It provides you with information collected by Apple’s Intelligent Tracking Prevention tool and shows all the trackers attempting to monitor you via that site.
You can also access far more detailed information by choosing Safari>Privacy Report. This will show you all the sites that have tried to track you and share which trackers are the most active. It will also let you know how many times Safari has prevented a tracker from profiling you.
Optimize Safari Privacy protections
Facebook is squawking its protest against one big Apple privacy innovation that will make it harder for online entities to track you online. Safari has many other tools to secure your privacy that you should learn.
 Apple
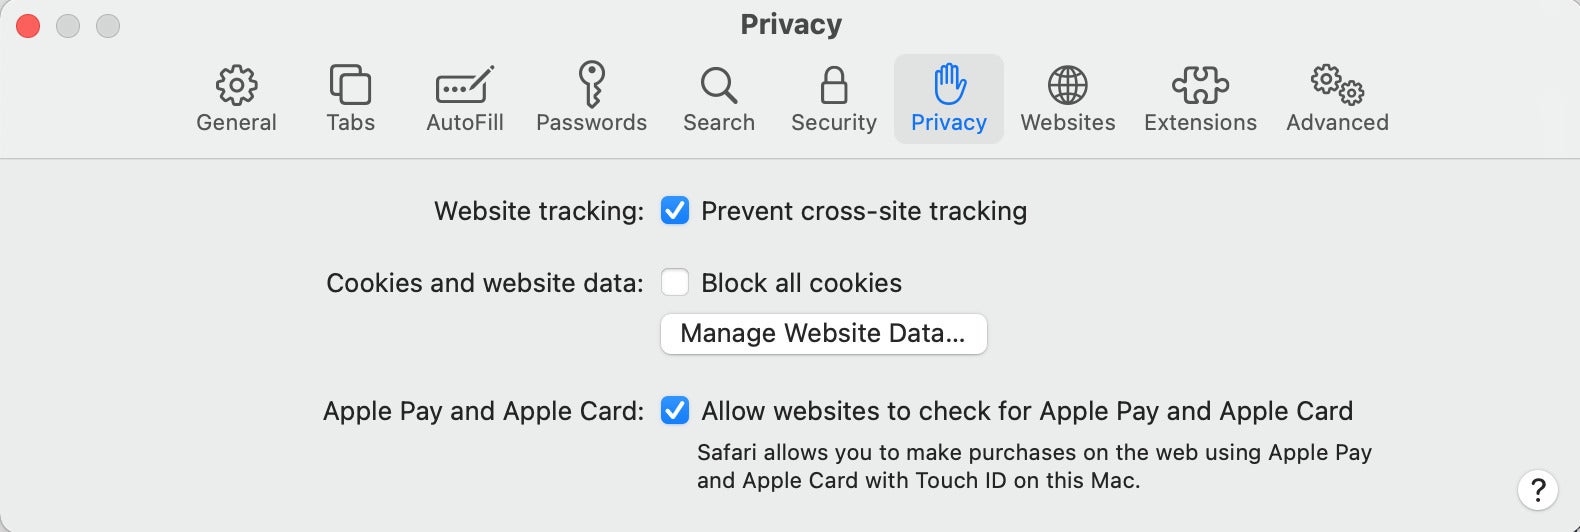
AppleIn Safari>Preferences>Privacy you’ll see a range of privacy protection tools.
Open Safari>Preferences>Privacy and you’ll see a range of privacy protection tools:
- Prevent cross-site tracking: Enable this and Safari will try to make it difficult for websites and services to track you.
- Cookies and website data: Check this to stop websites tracking you using Cookies. Some web services may require cookies in order to use them; just remember to disable cookies again once you are done.
- Apple Pay and Apple Card: If you use Apple Pay or Apple Card, you can choose whether to let websites check for this when you visit. If you uncheck this item, you’ll have to enter such details manually, which seems a minor inconvenience.
You can also set privacy protections for every website you visit. While on a site, open Safari>Settings for this Website. Here you’ll find a slew of tools that can be applied each time you visit the site, including:
- Use reader: Automatically open the site in Reader view (no ads).
- Enable Content blockers: Check to enable.
- AutoPlay: Allow all, stop, never.
- Pop-up windows: Block and Notify, Block, Allow.
- Camera: Ask, Deny, Allow.
- Microphone: Ask, Deny, Allow.
- Screen sharing: Ask, Deny, Allow.
- Location: Ask, Deny, Allow.
You can review these settings in Safari>Preferences>Websites. Do spend time reviewing Camera, Microphone, Screen sharing and Location permissions to make sure no sites are quietly gaining access.
Change your search engine
Open Safari>Preferences>Search and in the Search engine drop down box select DuckDuckGo as your default. This is one of the best ways to protect your privacy I know of, as this is a search engine capable of delivering excellent results that will not track you.
Audit your passwords
Safari has a password-audit feature that you can access from within the application via Preferences>Passwords. You’ll need to enter your login password, after which you’ll be able to review all the sites and services Safari knows you have password access to.
Look for a small yellow triangle.
If you see one, select it and then tap the Details… button to find out more. You’ll be warned if a password is easy to crack, or you’ve requested it across multiple sites.
Protect against spoofing
Open Safari>Preferences>Security and make sure Fraudulent sites protection is enabled (checkbox on). In the future, if you visit a site that’s recognized as a fake, you’ll be warned.
Use Sign In with Apple
Apple has improved its Sign In With Apple service, which third-party sites and services can now use to replace existing accounts. It’s worth using this service wherever it is available, as it’s far more private and secure than signing in with other such services.
Make use of App Privacy labeling
Starting in December, Apple insists that developers explain the privacy practices of each app they sell in a standardized format that works like a food nutrition label. You should pay close attention to this information whenever you consider downloading an application to your Mac. It is made available along with the app description on the App Store.
Biometric authentication for sites and services
Apple at WWDC 2020 confirmed that iOS 14 and macOS 11 would introduce support for a FIDO standard called Web Authentication (WebAuthn) in Safari. This essentially means you’ll be able to use Touch ID and Face ID to provide biometric authentication for websites and services. More info is available here.
Secure Siri
Apple scored an own goal on privacy when it was revealed that Siri shared small segments of conversation it records with third parties. Described at the time as a legitimate attempt to improve Siri’s services and accuracy, users were furious that Apple didn’t tell us it was doing this, even though Amazon, Google and others do the same.
Apple moved to fix this with new privacy controls for Siri.
- On a Mac, you’ll access these in System Preferences>Security & Privacy>Privacy>Analytics & Improvements where you should ensure Improve Siri & Dictation is unchecked to prevent Apple using Siri recordings on your Mac this way.
- You may want to disable sharing of crash data with developers and diagnostic and usage data with Apple to further improve privacy.
Review App privacy
In the same pane (System Preferences>Security & Privacy>Privacy) you’ll find a host of additional settings you should regularly review to ensure no app has permission to handle more of your personal information than you want to share.
There are multiple fields here, such as Contacts, Camera, Full Disk Access. Tap each one to verify that only those applications you trust have any access to this information. Ask yourself questions as you do so – does this app need this access to work for you? If not, why provide it?
Limiting access this way may limit what some apps can do, but the trade-off is privacy. Take a moment to explore Apple’s document on these controls.
Explore Sharing preferences
Head back to System Preferences>Sharing and disable things like screen sharing, file sharing, printer sharing and so on if you are not certain to make use of them.
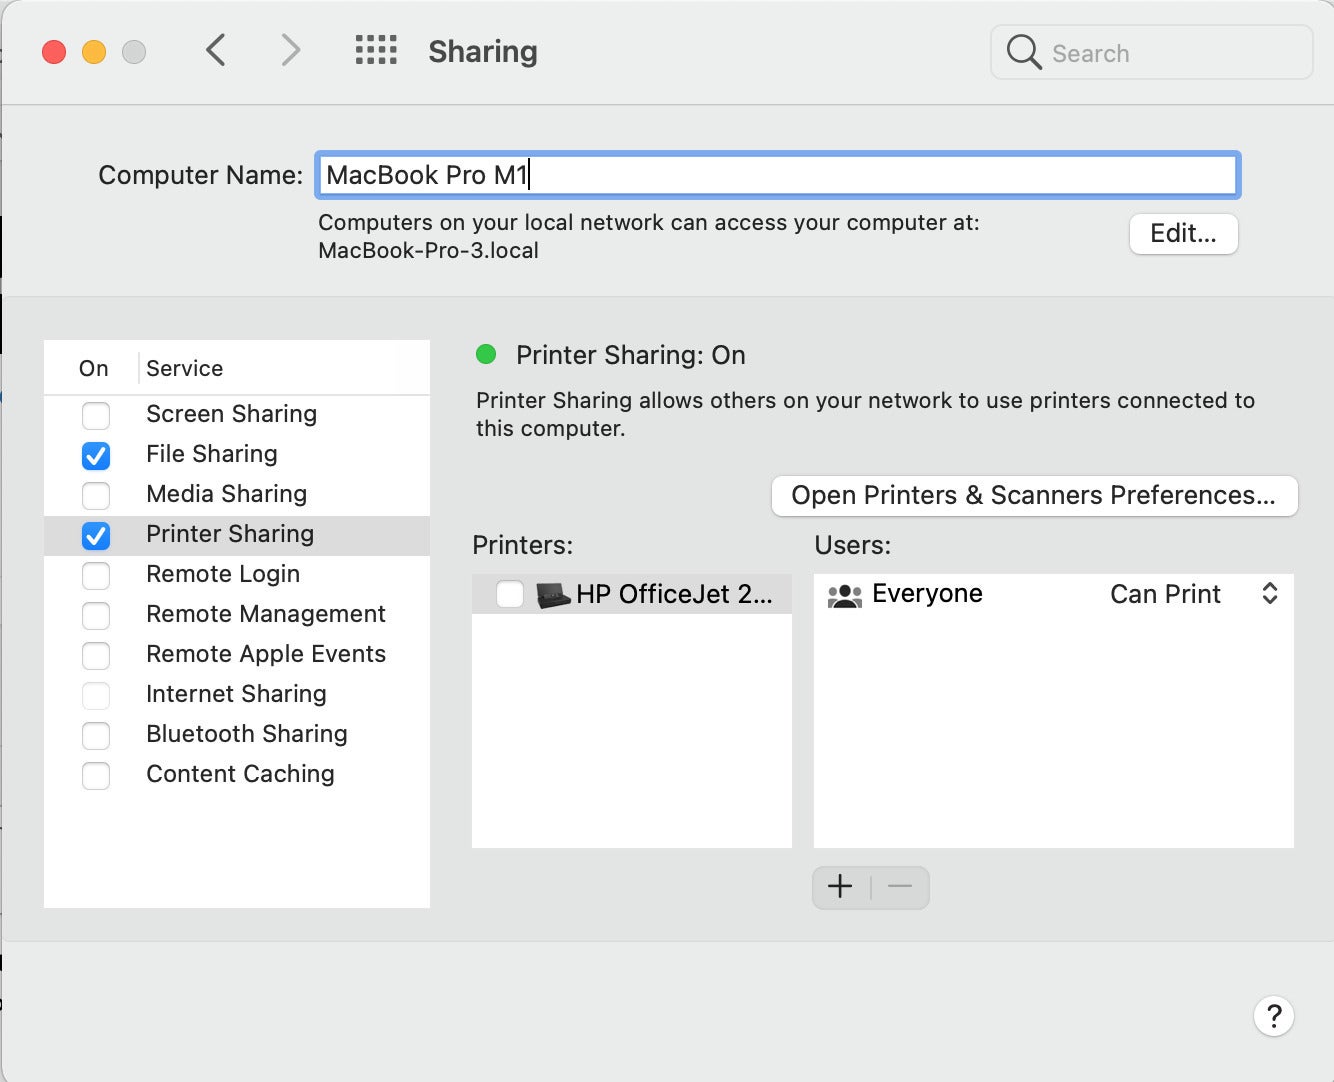 Apple
AppleUse the Sharing preference pane to tighten up what can be shared in macOS.
Take control of Notifications
Do you really want every Notification for every app to appear on your Mac’s screen when you are in a public place? To maximize privacy, open System Preferences>Notifications and disable them for any app you need to keep private. You should also verify that no notification appears on the lockscreen, and set any that you do receive as Banners, as those appear only briefly on screen.
Set up a Guest user
You can create a Guest user ID that you can permit others to use when you let them use your Mac. Guests can’t access any of your own apps, data or browser history. To enable this mode:
- Open System Preferences>Users and Groups.
- Tap the lock at the lower left and enter your login.
- Select Guest.
- Tick “Allow guests to log in to this computer.”
Guest mode requires no password and only provides access to Safari (when FileVault is enabled on your Mac). When the guest logs out, all information and files in the guest account folder is deleted.
A word about Spotlight Suggestions
Spotlight does so much, but privacy-conscious Mac users may want to prevent Siri Suggestions, which basically relies on your search being quickly shared with Apple to get suggested results from third-party services.
You may be OK with this, but some Mac users want even more privacy, which they can achieve by unchecking Siri Suggestions in System Preferences>Spotlight. To better understand the significance of this, tap the About Search and Privacy button to learn how your data is handled.
One more thing
Spotlight searches everything. Privacy-conscious users may sometimes create a folder (we could call it ‘Confidential’) somewhere on their Mac into which they save any documents or other items that must be kept highly secure.
The trick then is to open System Preferences>Spotlight and tap the Privacy pane.
The ‘Confidential’ folder can then be selected using the + button, or simply dragged and dropped into the box. In future, Spotlight will be prevented from searching through that folder, which stops the highly confidential documents it contains from showing up in search results.
I’d welcome any additional ideas around Mac privacy you might wish to share, so please drop me a line via Twitter, or join me in the AppleHolic’s bar & grill and Apple Discussions groups on MeWe.