

One of Android 11’s most useful additions is the new connected-device command center that comes up whenever you press and hold your phone’s power button. Have you seen that thing yet? By default, it has controls for smart lights and other connected gadgets associated with your phone and/or Google account — but with a teensy bit of tinkering, you can actually expand it to include controls for almost anything your curiously moist brain can cook up.
Maybe you want to add in a simpler shortcut for activating Android’s now-rather-buried split-screen function, for instance. Maybe you want to implement a one-tap link to a specific section of your system settings. Or maybe you want to create a time-saving tile that you can tap to compose a specific prewritten email or text message for on-the-fly sending — a thank you for a meeting with a client, perhaps, or an “on my way” update to send to a colleague or significant other (maybe even with your location attached!). The options are practically endless.
Best of all? It’s actually quite easy to do — at least, once you have the right tool and know how to use it.
Part I: Creating your new Android 11 power menu commands
Let’s not beat around the bush: The tool in question is a classic Android power-user app called Tasker. Now, fair warning: Tasker does tons of different stuff, and it can be more than a little overwhelming to wrap your head around and navigate.
This specific bit of customization is relatively simple, though, especially if you follow this step-by-step guide.
So here we go:
- Install Tasker onto your favorite Android phone — a step that I hope is obvious, but hey, we won’t skip over anything!
- Open up the app and tap the Tasks tab along its top.
- Tap the circular plus icon in the lower-right corner of the screen, then type in a title for whatever sort of command you want to add. This is what’ll show up within the button once we’re all finished. (And don’t feel any pressure to come up with something brilliant right now, by the way. You can always just type in some random placeholder text — even just gibberish, if you’re feeling especially saucy — and then go back and change it to something else later.)
- Tap the circular plus icon in the lower-right corner of the screen that comes up next, then look through the available actions to find the command you want.
Let’s pause to consider some specific examples — the very same possibilities we talked about a minute ago, in fact:
- If you want to create a simpler way to toggle Android’s split-screen command on and off, select the “App” category of options and then tap “Toggle Split Screen.”
- If you want to create a direct shortcut to a specific area of your system settings, select the “Settings” category of options followed by whatever specific settings section you want — “Accessibility Settings,” “Notification Settings,” “Wireless Settings,” even “Developer Settings,” if you’re wild enough to have that enabled. Then, an extra step you wouldn’t realize you needed: Tap the circular plus icon again, tap “Input,” and then tap “Back Button.” That’ll add in a secondary action that’ll make this particular function work properly.
- If you want to create a one-tap button that’ll let you compose a new text message that says “On my way!” and includes your current location coordinates, which you could then send to anyone you want on demand, tap “Phone” followed by “Compose SMS” and then type On my way! %LOC into the “Message” field. (You can change that text to whatever you want, of course — “Hear ye, hear ye, I am on my way”; “Hey, on my way, OK? Yay!”; “On me way, maties! Arr!”; etc.)
- If you want to create a one-tap button that’ll let you fire off a prewritten email to anyone you select, tap “Net” followed by “Compose Email” and then type whatever your silly little heart desires into the “Subject” and “Message” fields.
 JR
JRWhatever action or actions you pick, once you’ve got everything set on that front, all that’s left is to tap the back arrow icon in the upper-left corner of the screen twice to back yourself out to the main Tasker menu and make sure everything’s saved.
And now we’re ready to move into the actual Android power menu to find your freshly made, fragrant creations and add ’em into the proper place.
Part II: Adding your new commands into the Android 11 power menu
Take a deep breath, my deary: We’re almost done. (Also, breathing is just a good thing to do every now and then.)
With all that prep work behind us, it’s time to head into that potential-packed Android 11 power menu to bring these shiny new babies of yours into their cozy new home. This is probably a good moment to mention, as a reminder, that this will work only if you’re using a phone that’s running Android 11 (again, I’d like to hope that’s obvious, but — well, y’know) and also a phone where the manufacturer didn’t omit the excellent new connected-device command center entirely in a move designed to emphasize its own money-making services at the cost of your user experience (hi, Samsung-owning pals!).
Capisce? Capisce. All right — here’s all that’s left:
- Press and hold your phone’s power button for a couple of seconds. Whisper “Go, go, gadget menu!” to make yourself feel extra cool, if that’s your thing.
- When you see that spiffy new command center come up, tap the three-dot menu icon in its upper-right corner.
- Select “Add controls,” then select “See other apps” followed by “Tasker.”
You should then be able to select any or all of the custom commands you created:
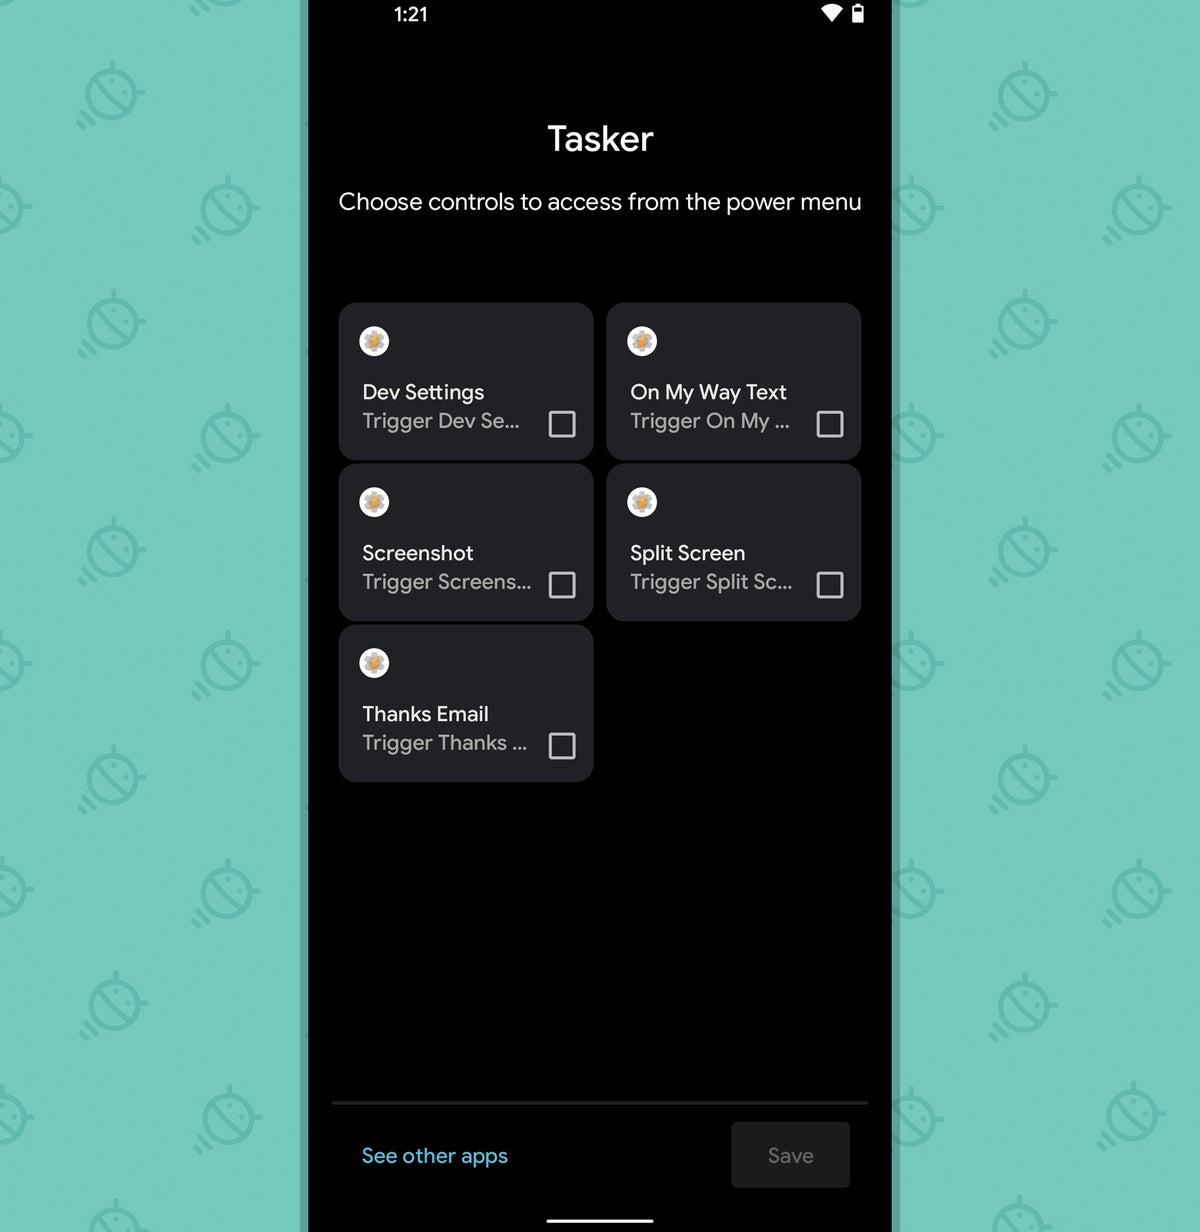 JR
JRAnd once you hit the Save button, they’ll be there and ready to use.
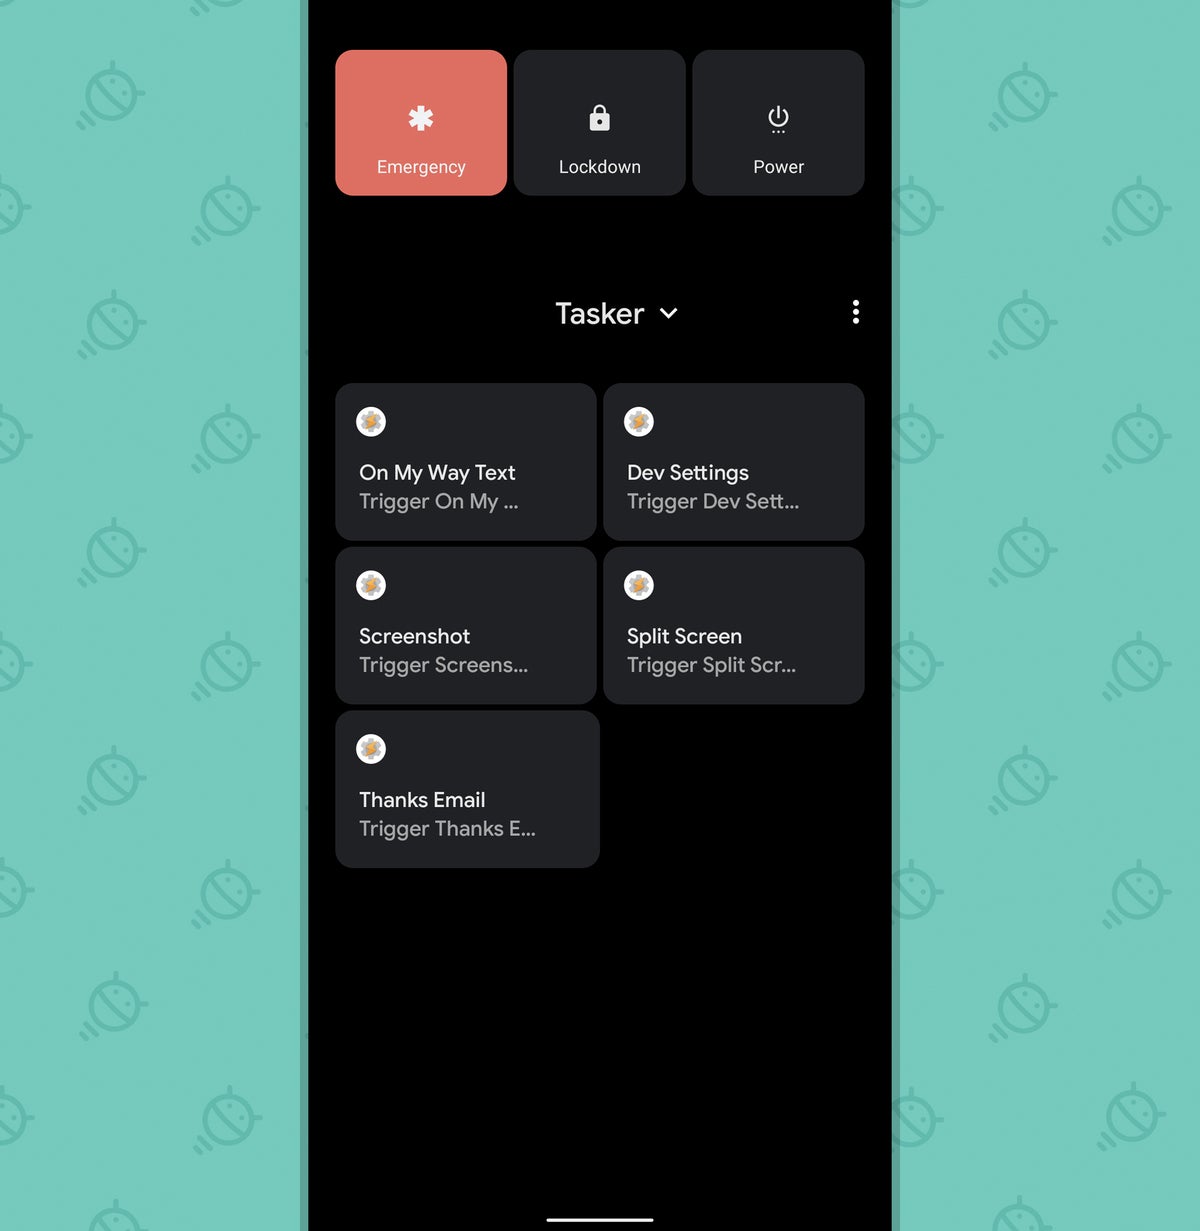 JR
JRFrom that point forward, you can toggle between your custom Tasker commands and the standard Android connected-device controls by tapping the downward-facing arrow next to the word “Tasker.”
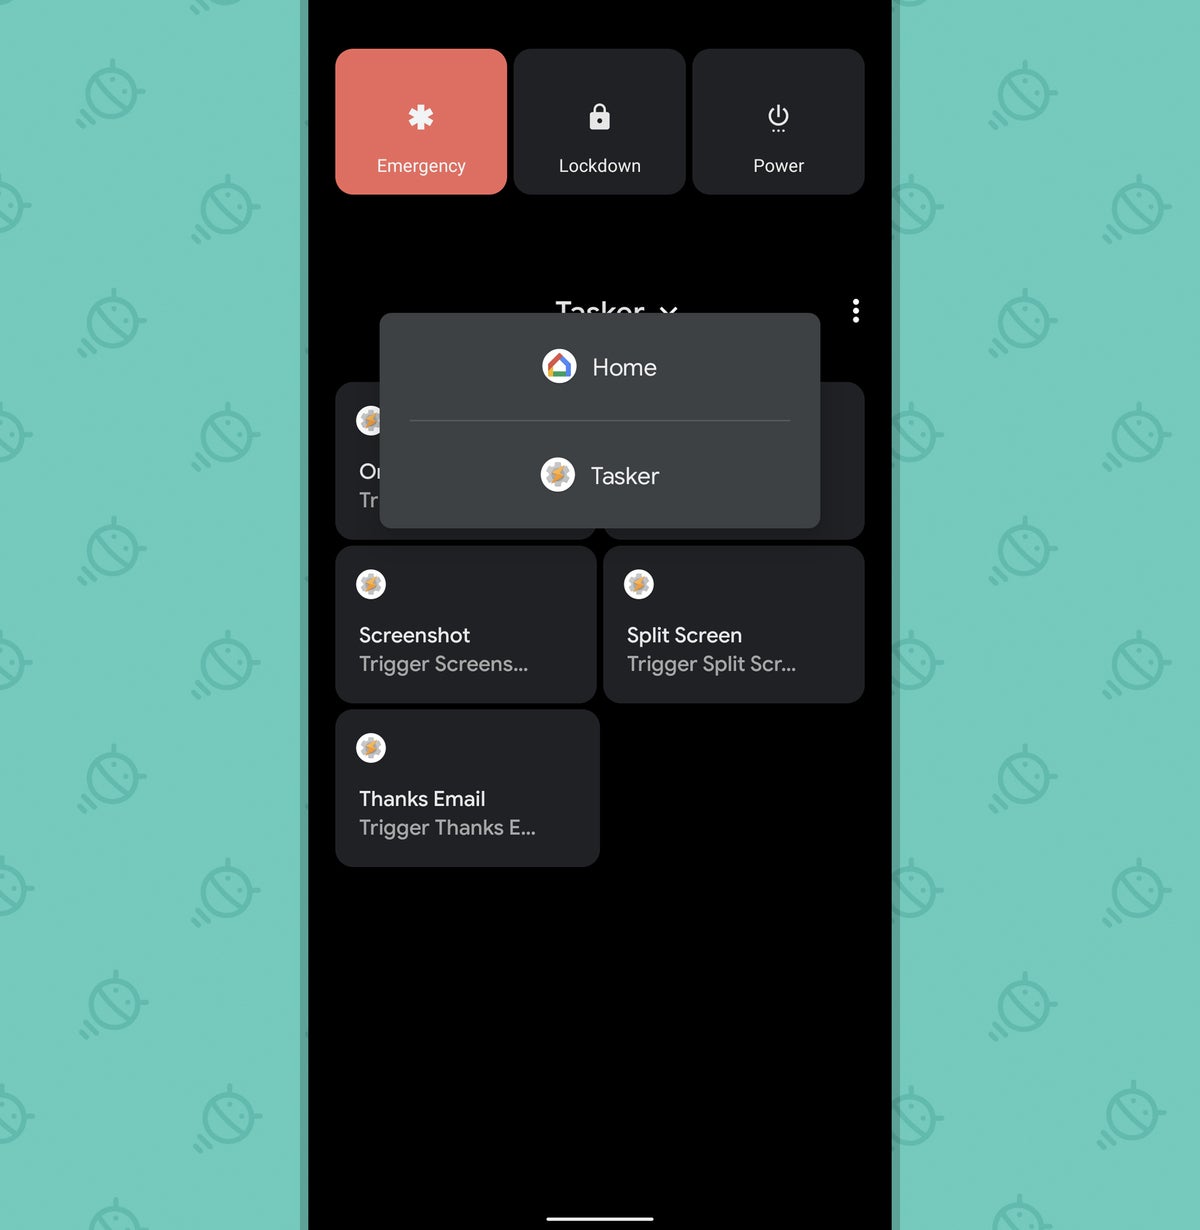 JR
JRNot bad, right?
A few fancy footnotes before we call it a day: Tasker costs $3.50 to use. And as far as privacy and permissions go, the app does invariably require access to certain areas of your device and data, with the specifics varying based on what exactly you’re asking it do — but it doesn’t transmit any of your info anywhere or do anything at all concerning, as its privacy policy makes abundantly clear. It’s also about as trusted, well-established, and reputable as it gets. Long story short, there’s no reason to fret about using this.
Oh, and one more thing: If you want to take things a step further, I’ve got some tips for optimizing that power menu and cutting out some of its default clutter in this collection of advisable Android 11 adjustments.
Just try not to make your iPhone-owning friends too jealous, okay? They’re still feelin’ pretty good about their newfound magical and revolutionary home screen customization powers (a possibility that was totally underwhelming and unnecessary up until this past summer, of course), and hey — what they don’t know what hurt ’em.
Want even more Googley knowledge? Sign up for my weekly newsletter to get next-level tips and insight delivered directly to your inbox.
