
Hey. You. Yes, you there — the one with your eyes on the screen. What if I were to tell you that that the browser you rely on for all of your web-based activities on your phone had oodles of extra features — top-secret settings that’d add awesome powers into your Android browsing adventures and make wiggling your way around this wacky ol’ web meaningfully easier?
Well, provided you’re using Google’s Chrome browser for Android, that’s as true as true can be. And best of all, it doesn’t take much to uncover all of Chrome’s carefully concealed treasures — if you know where to look.
Continuing on our recent theme of digging up hidden features and out-of-sight time-savers, I decided to break out my metaphorical spelunker’s hat (which is quite some cap, lemme tell ya) and dive deep into Chrome’s cloudiest corners to see what sorts of goodies I could unearth. And good golly, did I find some fantastic stuff.
The six settings on this page will make your Android-based web browsing more powerful, more efficient, and more pleasant. They’re all just sitting there waiting to be found, too — so really, why not take advantage of what they have to offer?
Before we spelunk any further, though, one quick word of warning: All of these settings are part of Chrome’s flags system, which is a home for under-development options that are still actively being worked on and aren’t technically intended for mainstream use. The flags system is meant for expert users and other similarly informed (and/or insane) folk who want to get an early look at advanced items. (It also evolves pretty regularly, so it’s entirely possible some of the settings mentioned here may look different from what I’ve described or even be gone entirely at some point in the not-so-distant future.)
What’s more, the flags system has loads of advanced options within it, some of which could potentially cause websites to look weird, Chrome itself to become unstable, or even your ears to start spewing a delightfully minty steam. (Hey, you never know.) So in other words: Proceed with caution, follow my instructions carefully, and don’t mess with anything else you encounter in this area of the browser unless you actually understand it and genuinely know what you’re doing.
Got all that? Good. Now, let’s give your browser some spiffy new superpowers, shall we?
Chrome Android setting No. 1: The magic page-peeking panel
This first secret Chrome setting for Android is probably my favorite — ’cause it’s just so darn useful, at least with the way I tend to hop around websites on my phone (which is probably best described as an “all over the place” kind of hopping strategy).
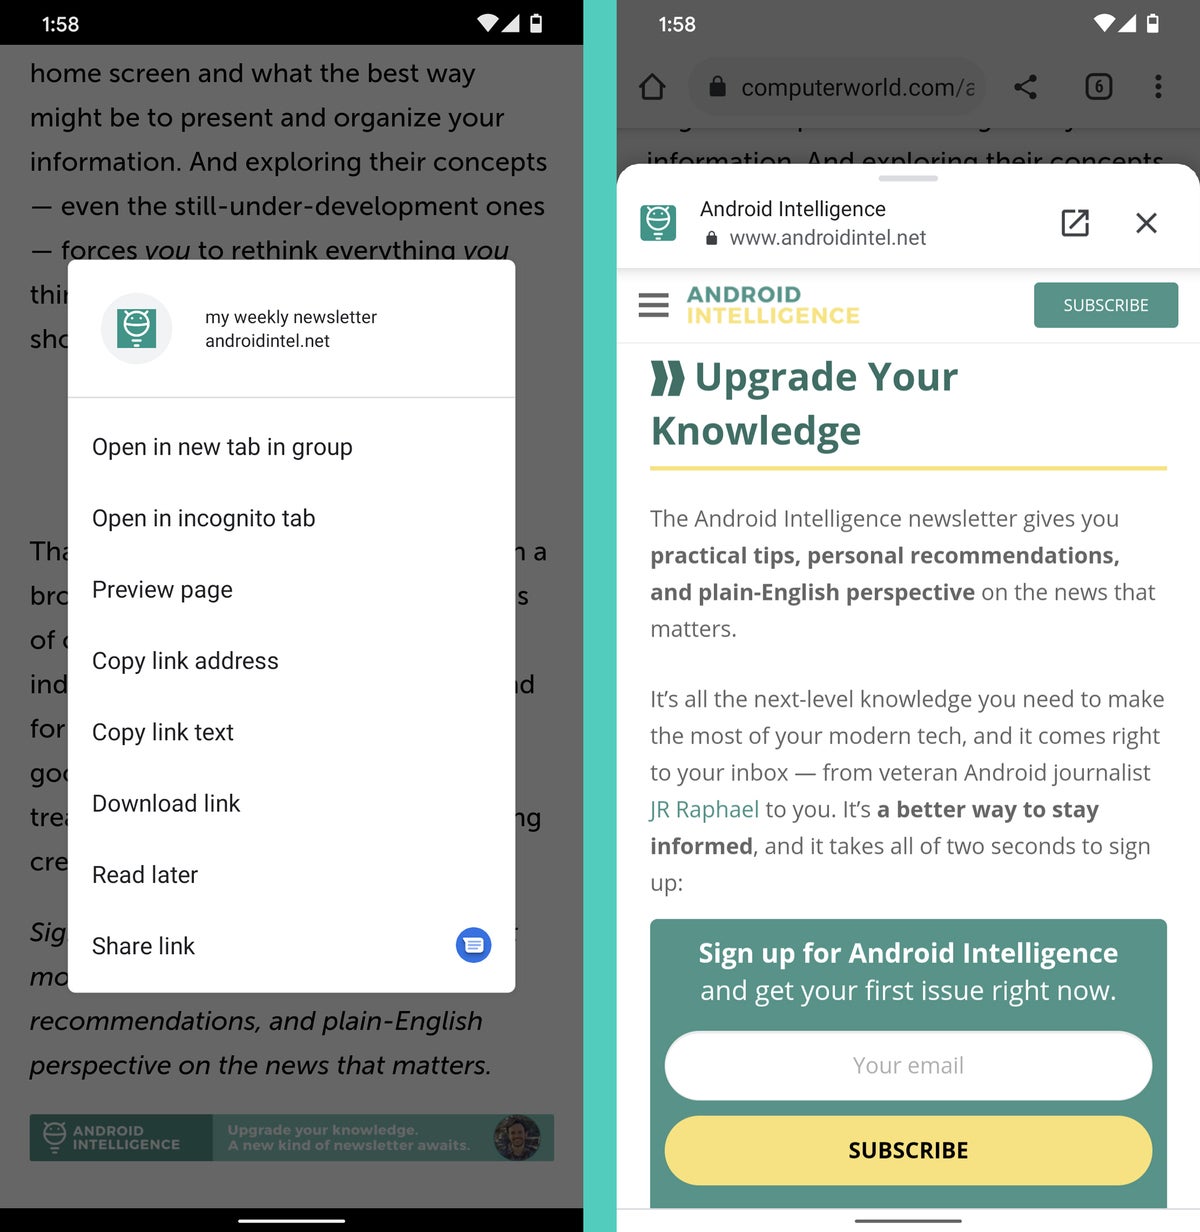
See if the need applies to you: Do you ever find yourself looking at a web page and wanting to open a link without navigating away from the page you’re already viewing? Maybe it’s something you want to peek at quickly just to see what’s there — or something you want to scan over before going back to where you were a second earlier.
Usually, you’d have to go through the clunky process of opening the link as a new tab, switching over to that tab, looking at the newly opened page, then closing it and going back to your original tab. Well, stop that silliness immediately, you silly ol’ salamander. Chrome has a much better way to handle this.
It’s a supremely smart peeking panel that pulls up any link in an overlay atop the page you’re viewing. You can swipe the panel up or down to view more or less of the secondary page — and if you eventually decide you want to send the page into its own tab, you can do that with a single tap, too. But if you don’t, you can just swipe it away when you’re done and then go on basking in the glow of your original page without any real interruption.
 JR
JR To add the option into the Chrome Android app on your phone:
- Type chrome:flags into the app’s address bar.
- Type the word ephemeral (yes, ephemeral) into the search box at the top of the screen that comes up.
- Find the delightfully named “An ephemeral Preview Tab using the bottom sheet” (seriously, that’s downright poetic, isn’t it?). Tap the box beneath it and change its setting to “Enabled.”
- Tap the Relaunch Now button at the bottom of the screen.
And that’s it — you did it! (Go ahead and give yourself a quick pat on the back, you audacious explorer.) From now on, you can open up any web page, press and hold any link within it, and then look for the “Preview page” option in the menu that pops up to experience the joy of in-browser multitasking.
And an extra bonus tip: If you want that preview panel to appear in a more visible state right off the bat — instead of starting as a tiny tab that you then have to swipe up to see in detail — go back to that same Chrome setting and change its status to either “Enabled Open at half state” or “Enabled Open at full state” to find the style that works best for you.
Chrome Android setting No. 2: A web-wide dark mode
Android’s had a system-wide Dark Theme option since 2019’s Android 10 release, but you know what’s weird? Even when your device is in its fully darkened state, pages in your phone’s web browser are still as bright as day (or, um, however bright they usually are).
As of now, Android’s dark mode doesn’t have any impact on the web as it appears within the Chrome Android app — only on the menus and other areas around the actual page you’re viewing. And that’s a bit of a bummer, since a big part of what you do on your phone probably revolves around what’s inside that browser’s borders.
But wait! Chrome actually does have a way to make the entire web responsive to Android’s Dark Theme. It’s just not activated or available by default. Once you flip that switch, though, any page you open on the web will automatically transform itself whenever your phone’s dark mode is enabled. See?
 JR
JR (Insert wild oohing, ahhing, and optional (and generally not encouraged) undergarment throwing here.)
Here’s the trick:
- Assuming you have Android 10 or higher on your phone, open up Chrome and type chrome:flags into the browser’s address bar.
- Type darken into the search box at the top of the screen that comes up.
- See the item labeled “Darken websites checkbox in themes setting”? Tap the box beneath it and change it from “Default” to “Enabled.”
- Tap the Relaunch Now button at the bottom of the screen.
There’s one more series of steps in this one. Once Chrome restarts itself, you’ll have to go and finish enabling the new setting that we just uncovered:
- Tap the three-dot menu icon in the Chrome’s upper-right corner and select Settings.
- In the main Chrome settings menu, tap “Theme.”
- Under the “System default” option, you should see a new checkbox that says “Dark websites.” Check it!
- Make your way out of that menu and back to the main browser area.
And there ya have it: From here on out, whenever you activate your phone’s Dark Theme, any pages you’re viewing within Chrome will automatically follow suit.
One related tip: If you ever decide to deactivate this flag and turn the setting off, be sure to first head back into Chrome’s main settings menu and uncheck the box next to “Dark websites.” Otherwise, that setting will remain in the active position — and deactivating the flag will then hide it out of view — so it’ll end up being stuck on with no easy way to turn it back off.
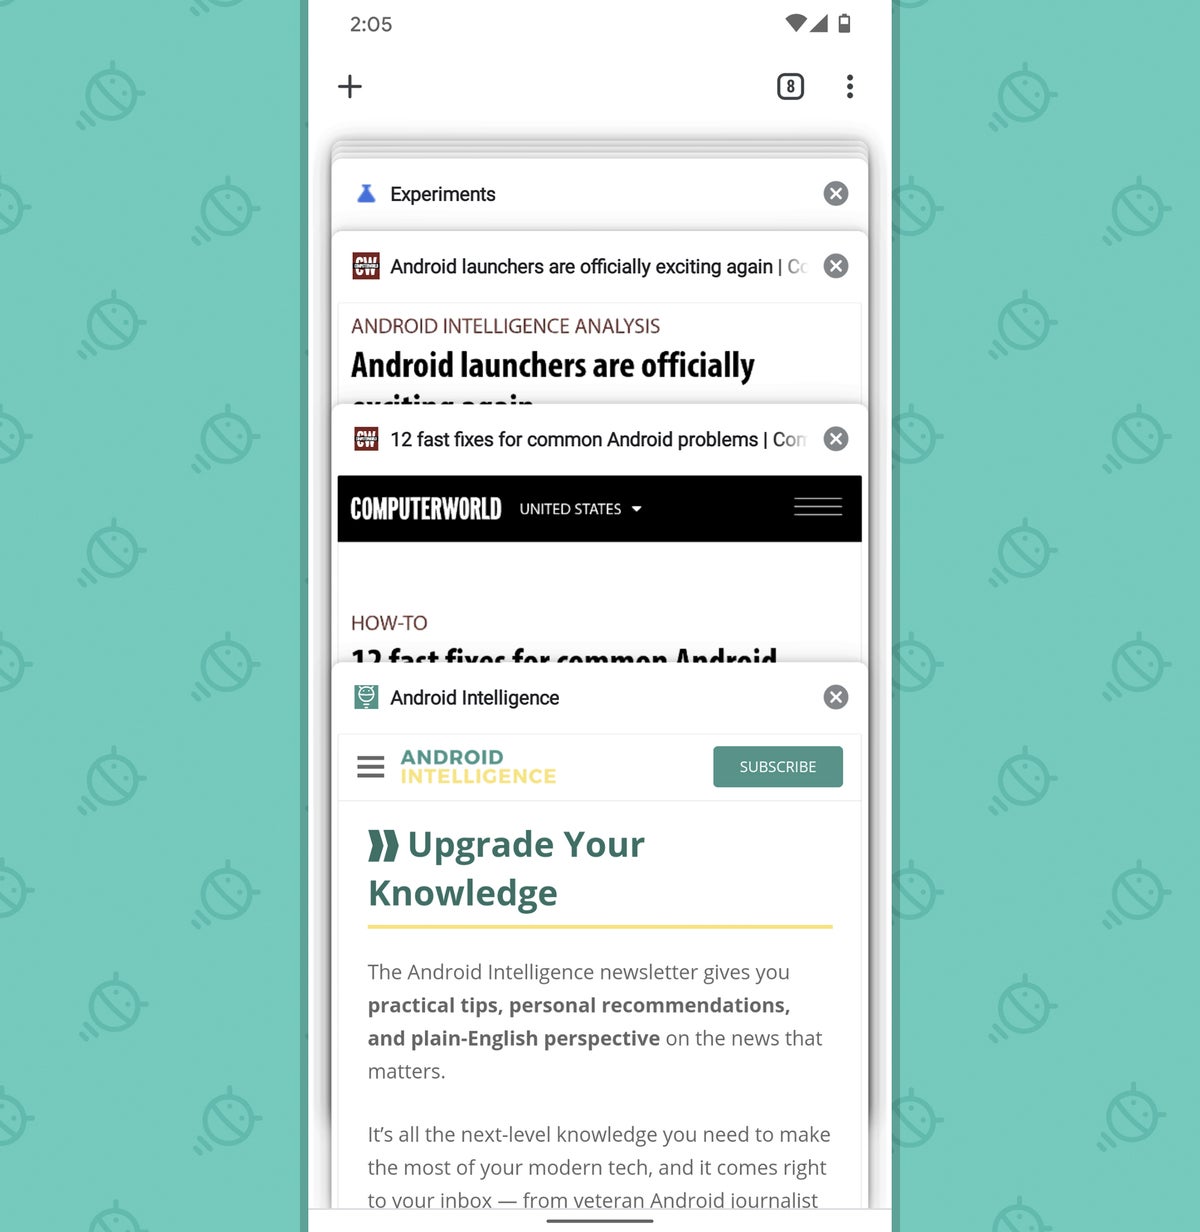
Chrome Android setting No. 3: The mobile browser tab grid
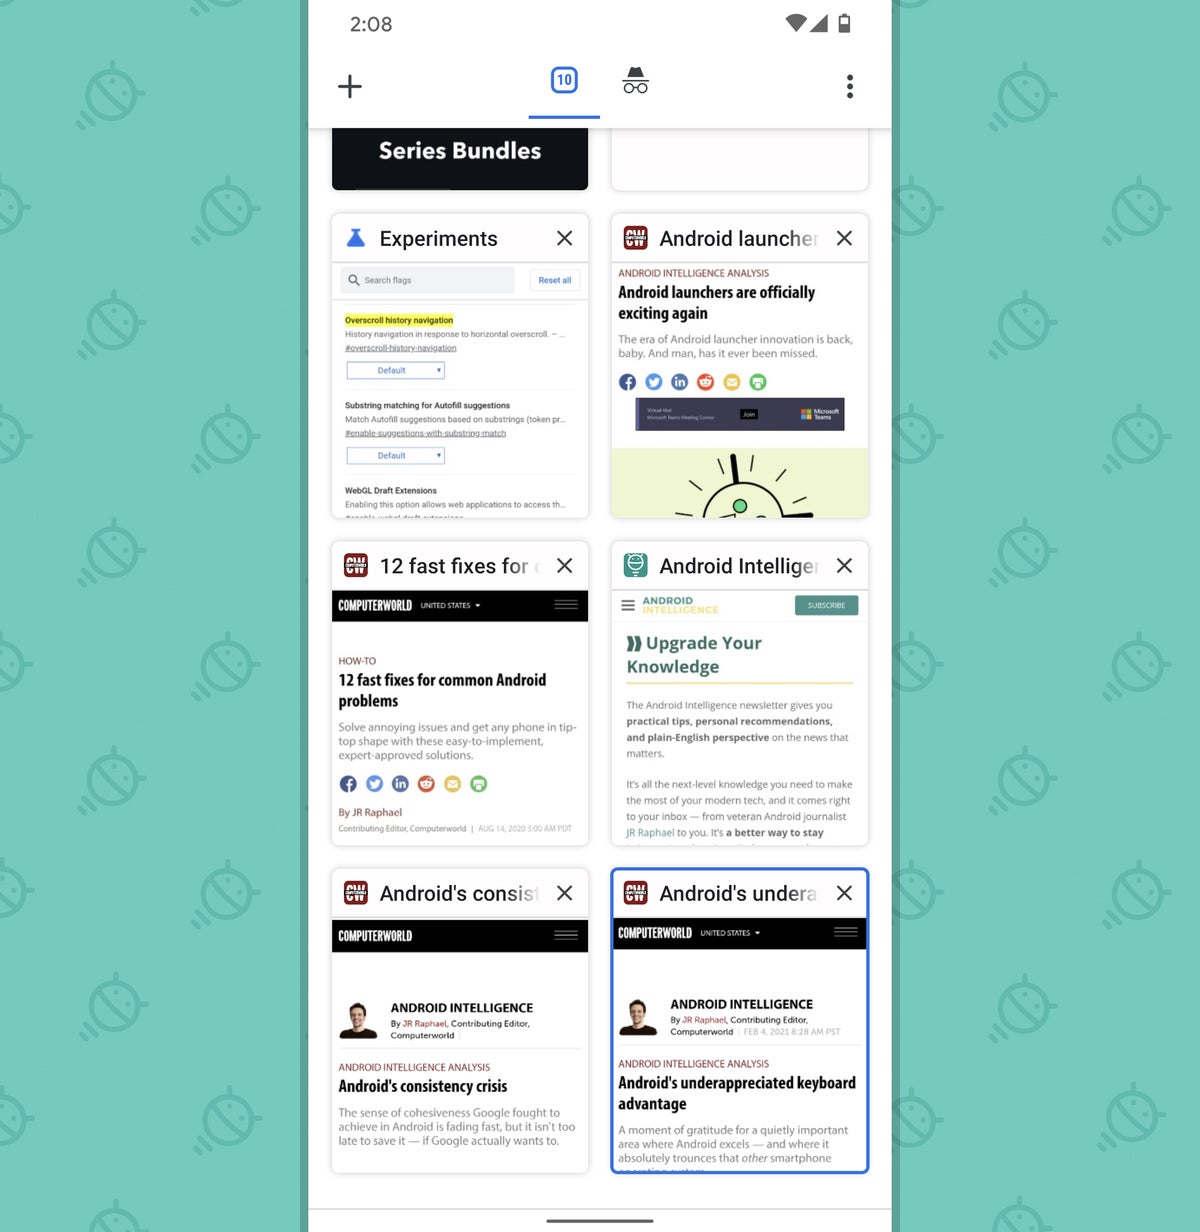
Google’s been experimenting with the way it shows tabs in Chrome on Android for something like 749 years now — but for most people, by default, tabs typically seem to show up in the standard full-screen card view that Chrome’s had for quite a while now.
Y’know, the screen that looks like this:
 JR
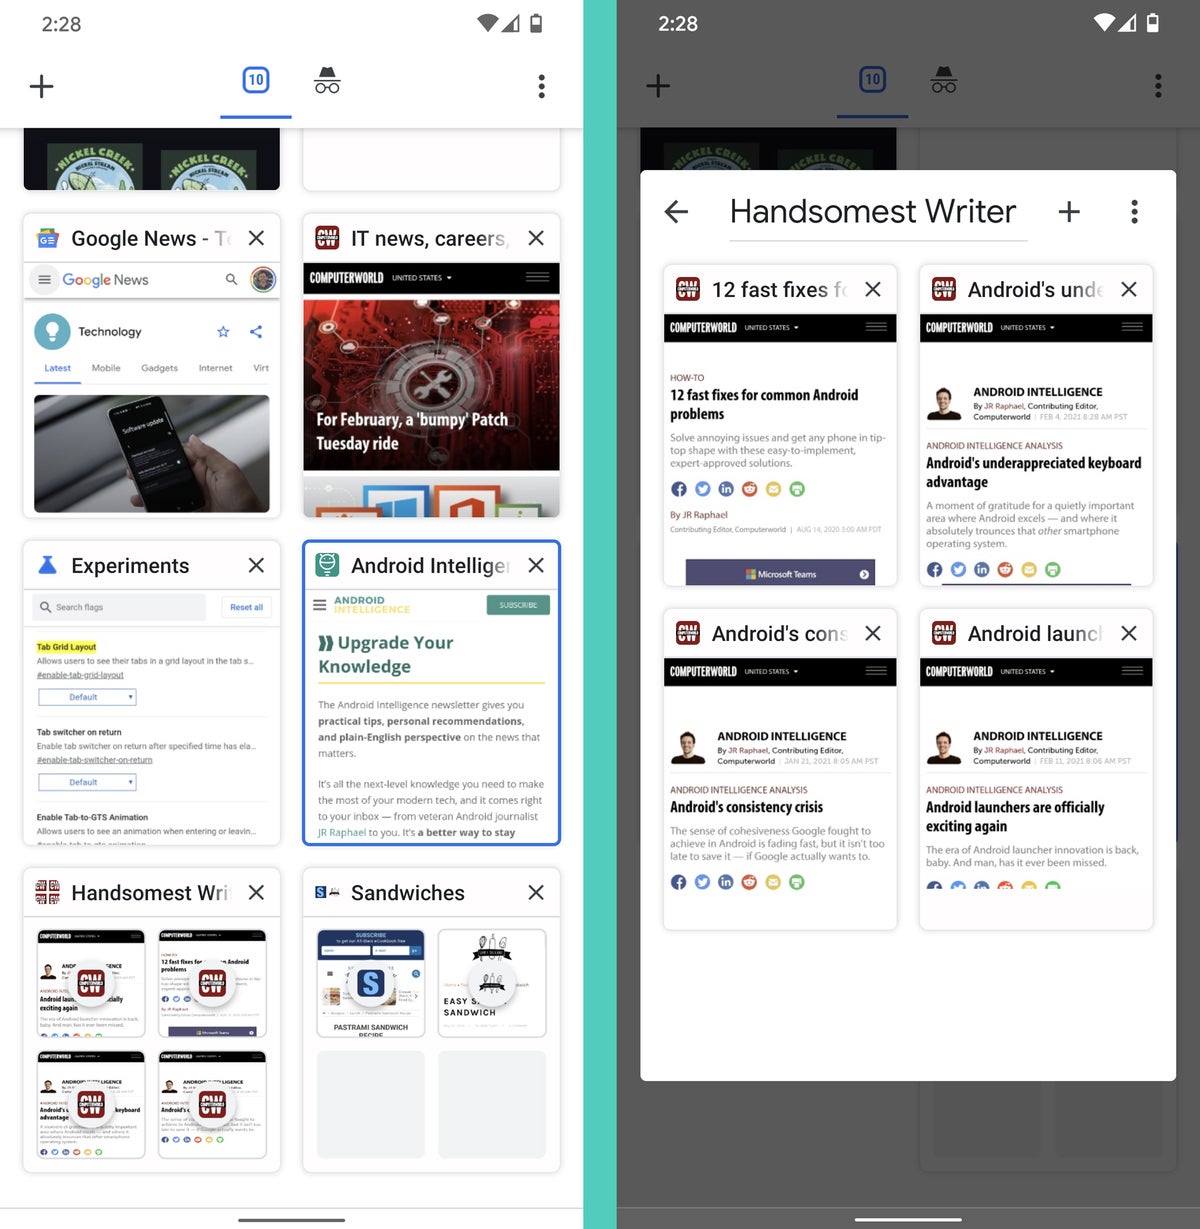
JR There’s a newer interface available that ditches the full-screen cards and instead gives you a grid of small thumbnails, where you can see all of your open tabs at once:
 JR
JR Whether that’s better or worse is mostly a matter of personal preference, but visual differences aside, the grid setup opens the door to some other interesting new advantages — which we’ll get into next.
First, if you want to give the tab grid a go:
- Type chrome:flags into the Chrome address bar on your phone (starting to feel familiar yet?).
- Type tab grid into the search box at the top of the screen that comes up.
- Tap the box beneath “Tab Grid Layout” and change it to “Enabled.”
- Tap the Relaunch Now button at the bottom of the screen.
For some reason, this particular change requires two restarts to take effect, so after Chrome restarts, you’ll then have to close it again — by swiping up from the bottom of your screen to get to Android’s Overview interface and then swiping away the Chrome card, if you’re using Android gestures, or by tapping the square-shaped Overview button and then dismissing the Chrome card, if you’re still using the old three-button nav setup — before you’ll see the new setup.
Chrome Android setting No. 4: Advanced tab grouping
Another Chrome feature that feels like it’s been under development forever is tab grouping — something that’s broadly available on the desktop front now but still curiously tucked away and hidden on Android.
Once you have tab groups enabled, you’ll be able to drag and drop tabs on top of each other within that fancy-schmancy new tab grid we just looked at — and that’ll group ’em together for advanced organization on your phone. You can even give each group a friendly little name to make it even easier to keep track of:
 JR
JR To get this one going on your phone:
- Type chrome:flags into the Chrome address bar on your phone (yes, this again…).
- Type tab groups into the search box at the top of the screen that comes up.
- Look for the item labeled “Tab Groups” (just plain “Tab Groups”!). Tap the box beneath it and change it to “Enabled.”
- Tap the Relaunch Now button at the bottom of the screen.
Now just tap that dapper tab count number in the upper-right corner of the browser and try dragging any open tag onto another one to make your first group. Once you make it, you can tap the group to open it and then tap its title to rename it.
Whee!
Chrome Android setting No. 5: A native article-saving system
Speaking of having way too many tabs open, how ’bout saving yourself the trouble of keeping 7,000 things open at once and instead saving some articles for later reading? Chrome actually has its own built-in system for accomplishing this from right within the browser — if you know how to find it.
Once it’s activated, you can just press and hold any link on any page in the browser…
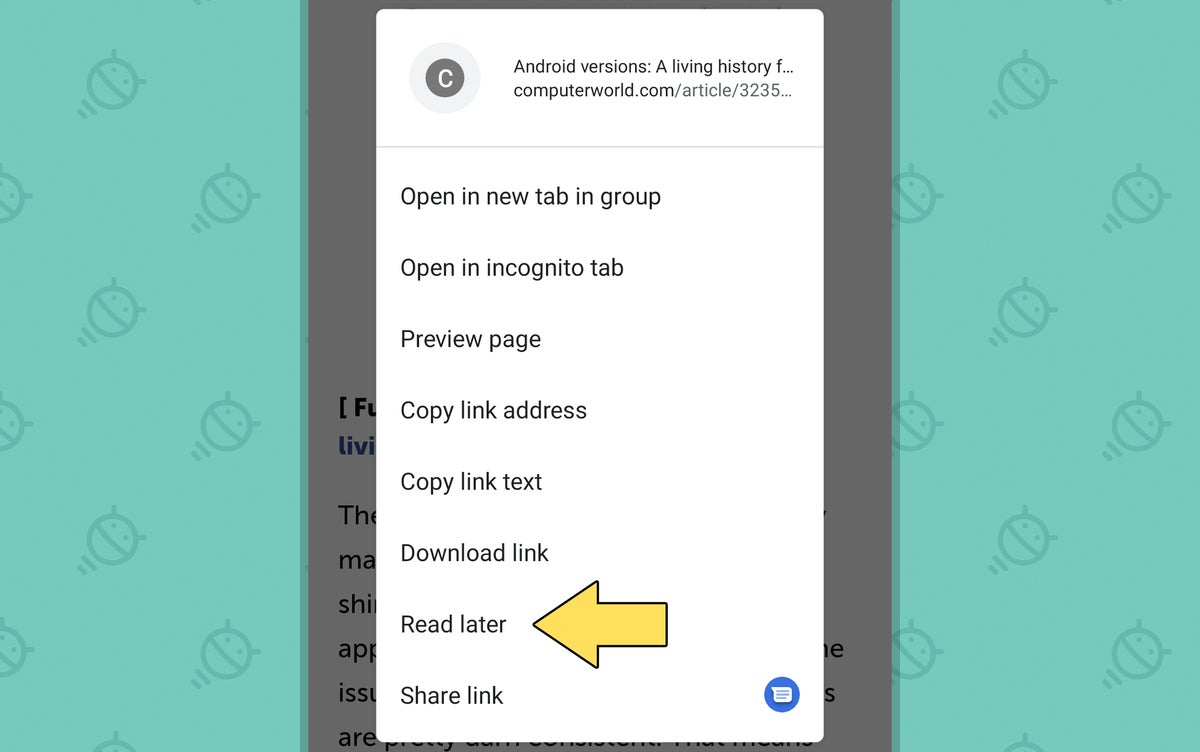 JR
JR And hey, how ’bout that? Tap that “Read later” option, then go look for the new Reading List section within your browser’s bookmarks, and…
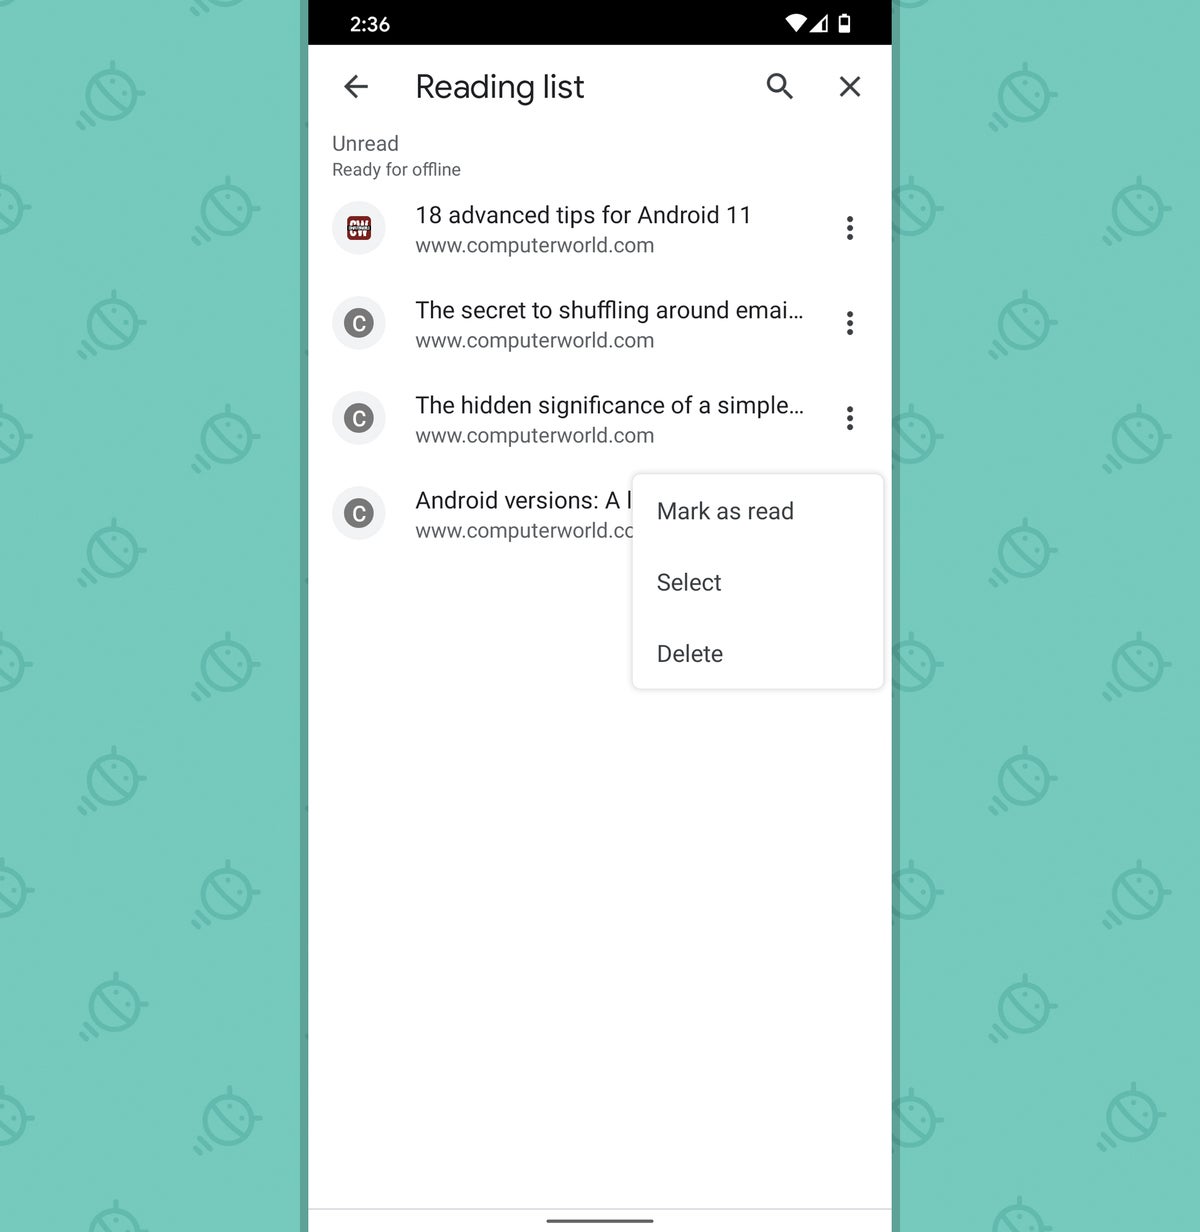 JR
JR Huzzah! Effective, simple, and convenient — a killer combination if I’ve ever seen one.
To enable Chrome’s secret Reading List setting:
- Type chrome:flags into the Chrome address bar on your phone yet again.
- Type read later into the search box at the top of the screen that comes up.
- Tap the box beneath “Read Later” and change it to “Enabled.”
- Tap the Relaunch Now button at the bottom of the screen.
Then, the next time you want to save something for later reading, press and hold the link to the story, then select “Read later” from the menu that comes up. (Note that for whatever reason, this works only with links as of now — not with a page you actively have open. Go figure.)
When you’re ready to find the stuff you’ve said, tap the three-dot menu icon in Chrome’s upper-right corner, select “Bookmarks,” and look for the “Reading list” option there. (If you don’t see it right away, you might have to hit a back-facing arrow in the upper-left corner of the screen to get back to the main bookmark menu.)
You can enable the Reading List setting in Chrome on the desktop, too, by the way — no matter what kind of computer or operating system you’re using — and all of your saved stuff will then always stay synced between your devices and available wherever you need it. You can find the instructions for that part of the process in this excerpt from a recent newsletter of mine.
Chrome Android setting No. 6: The delayed download advantage
All righty — last but not least in this hefty Chrome settings collection is a handy way to schedule a download within the Chrome Android browser. Maybe you’ve come across a file you want to save but would rather not burn through your mobile data allotment to download immediately, for instance. This feature makes it easy as can be to grab the file while it’s still front of mind but then put off the actual transfer until sometime later.
You can either pick a specific date and time — or, perhaps more sensibly, just specify to have the download begin as soon as you’re back on Wi-Fi:
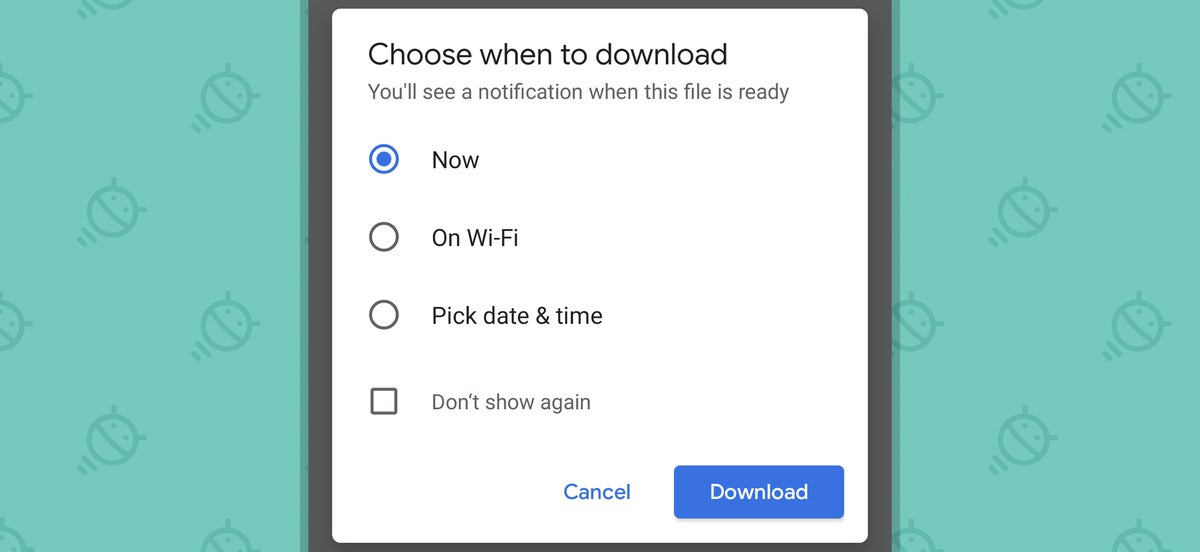 JR
JR Before you can pick either path, you’ve gotta give yourself the option:
- Once last time, type chrome:flags into the address bar in the Chrome Android app.
- Type download later into the search box on the screen that comes up.
- Tap the box beneath both “Enable download later” and “Show download later dialog on WiFi” and change both of those settings to “Enabled.”
- Tap the Relaunch Now button at the bottom of the screen.
And that, my fellow efficiency-seeker, is it: The next time you tap on a file to download within Chrome, you’ll see that shiny new scheduling option.
See? I always knew putting something off was the best way to get it accomplished.
Want even more Googley knowledge? Sign up for my weekly newsletter to get next-level tips and insight delivered directly to your inbox.
